How to Add a Watermark in PowerPoint
by  Lina Thorne • Updated · Posted in Watermarking Tips
If you are wondering whether you should add a watermark to a PowerPoint presentation, the answer is yes. Naturally, the main purpose of a watermark is to protect your digital property and prevent unauthorized use. Afterall, it is possible for someone to steal your presentation – the presentation you’ve been working so hard on! – and pass it as their own. If you don’t want this to happen, you should watermark your PowerPoint presentation. It’s a great and effective way to safeguard your digital property.
A brand logo in the background of your slides can add a touch of professionalism to your presentation and make it look neat. In addition to this, if you are a freelancer or an owner of a small brand and you need to pitch something to a bigger company, by adding a watermark to your presentation, you will make people at this company remember your brand better. After all, if you want to make your brand name and logo stick in people’s minds, show it to them repeatedly and as often as you can.
With the help of a watermark you can inform people that your presentation is merely a draft or a final version. A textual watermark that says “Confidential” is usually used to show that a presentation contains sensitive information that shouldn’t be shared with anyone else.
What’s great about watermarks is that adding a watermark to a PowerPoint presentation is a simple task that isn’t laborious or time-consuming. You’ll be able to do this even if you’re a complete beginner when it comes to watermarking your content. Yet, a watermark on a PowerPoint presentation will bring you a lot of benefits.
What is a Watermark in PowerPoint?
A watermark is some text or an image that is shown on the slides of your presentation. Commonly, a watermark is placed somewhere in the background, behind the content of your slide. It can appear on every slide of your PowerPoint presentation or just on selected ones. It also tends to be quite transparent because your watermark should be visible, yet it shouldn’t distract or interfere in any way with the content of your presentation. Only then it will be able to do its main job.
Generally, there are two types of watermarks: a textual watermark and a logo watermark. The latter is pretty self-explanatory – you use your brand logo as a watermark. Naturally, for this, you actually need to have a brand logo. You need to either create it yourself or hire a designer who can create it for you. In other words, there’s some preparation involved before you get to watermarking.
A textual watermark is basically some text. Sometimes, textual watermarks are paired with icons. But in the majority of cases, people just tend to use their brand name as a watermark. This is an easy and quick way to protect your content because you won’t have to do anything prior to watermarking. Plus, it’s possible to use any text you want. You can write “Confidential” or “Draft”, etc. In a way, with a textual watermark, you will have a bit more freedom.
Of course, you can mix and match your watermarks in PowerPoint. You can watermark one presentation with your logo, then the other one with your brand name. It’s even possible to watermark some slides with a logo and other slides with a textual watermark. It all depends on your needs and preferences.
Without further ado, let’s see how you can insert watermarks in a PowerPoint presentation.
How to Add a Watermark in PowerPoint
Let’s start with adding a textual watermark in PowerPoint. Here are the simple steps that you need to follow:
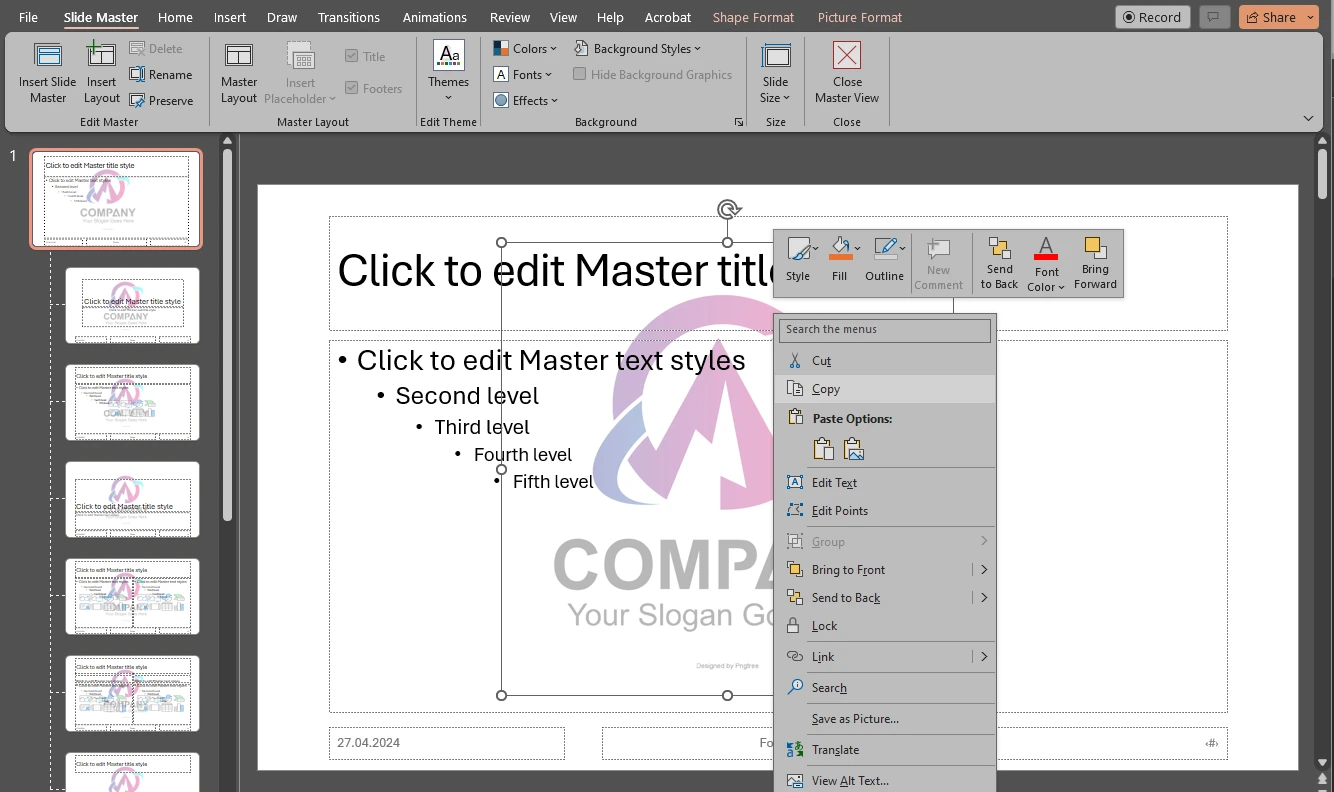
- Open your presentation and go to View > Slide Master.
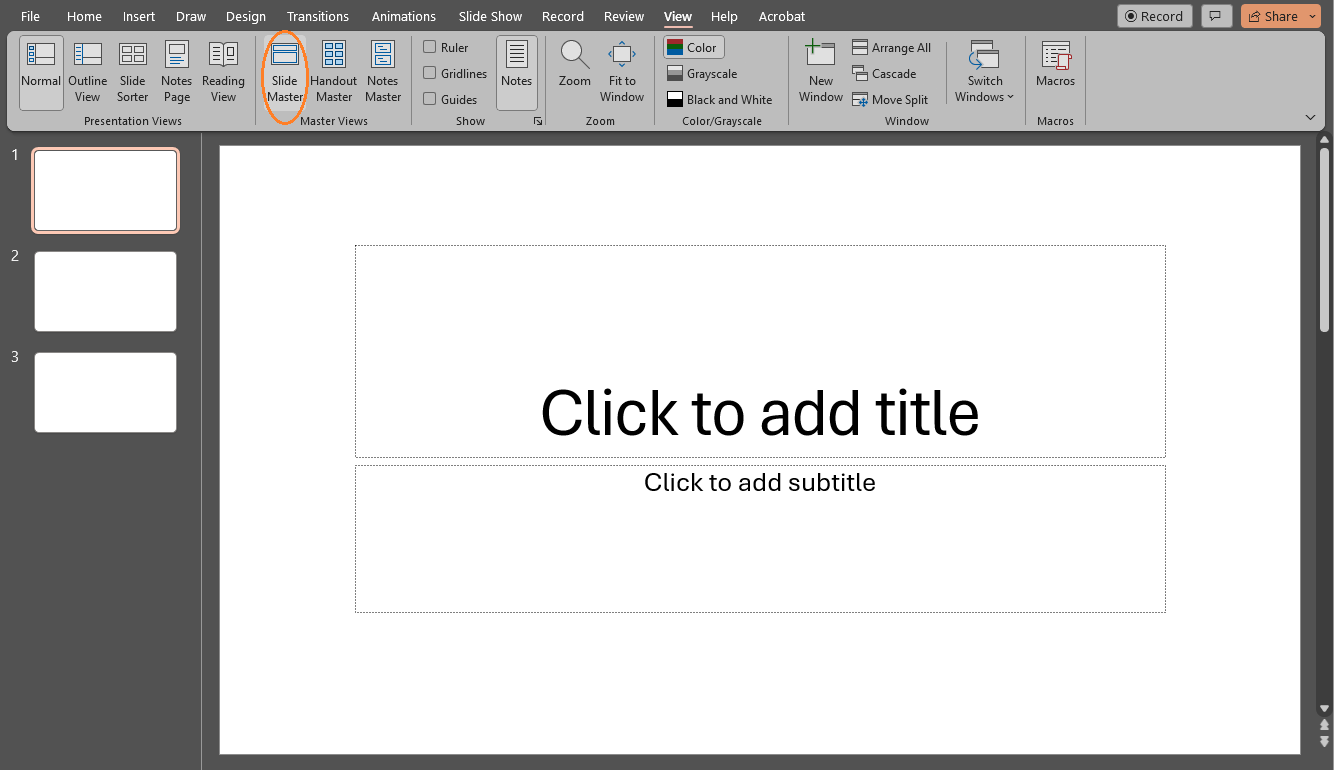
- When you are in the Slide Master, make sure that you scroll to the very top and open the very first slide. This is crucial if you want your watermark to appear on every slide of your PowerPoint presentation including any new slides that you create.
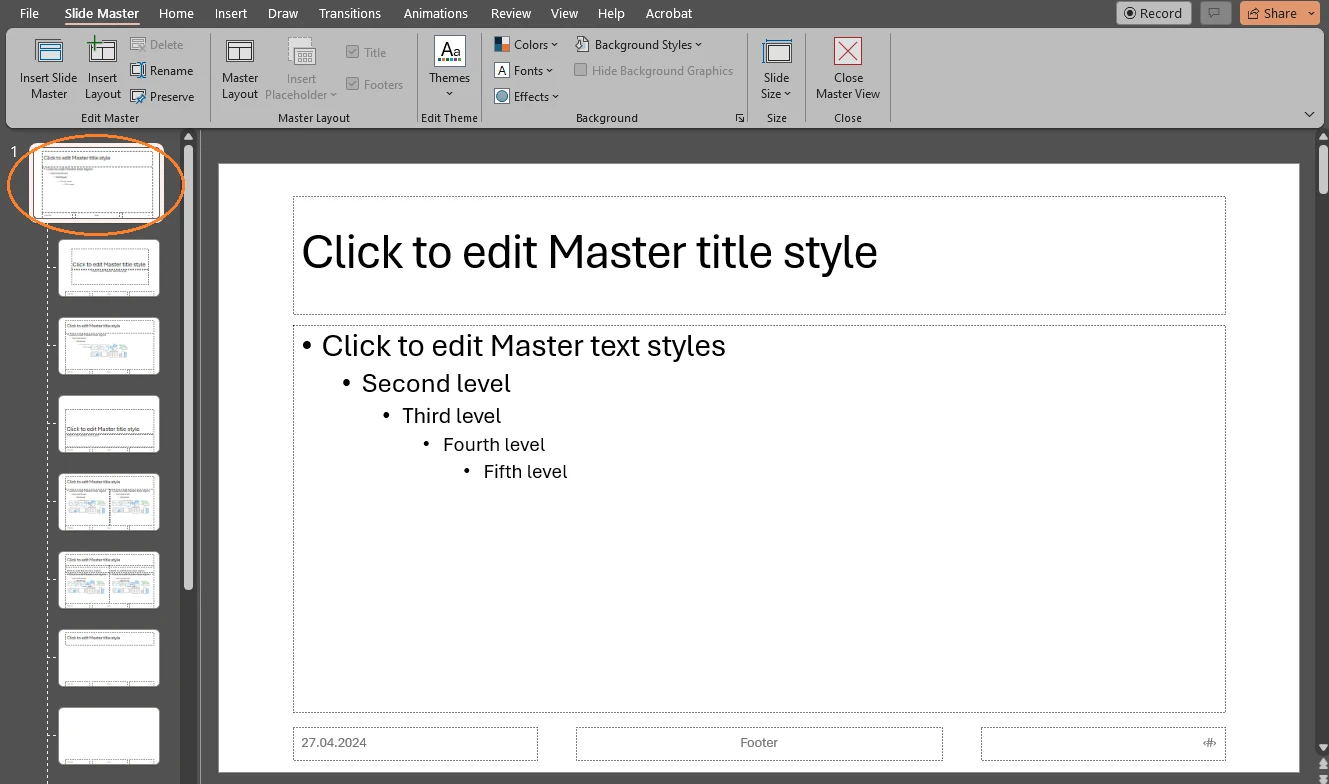
- Next, go to Insert > Text Box.
- Once the Text Box is selected, use your cursor to draw a new text box on your slide. Type in any text you want. For instance, it can be your brand name. This is also how you can add a Draft watermark in PowerPoint. In Microsoft Word you can add a DRAFT watermark by using their ready-made templates. But this isn’t the case for PowerPoint. There are no templates here.
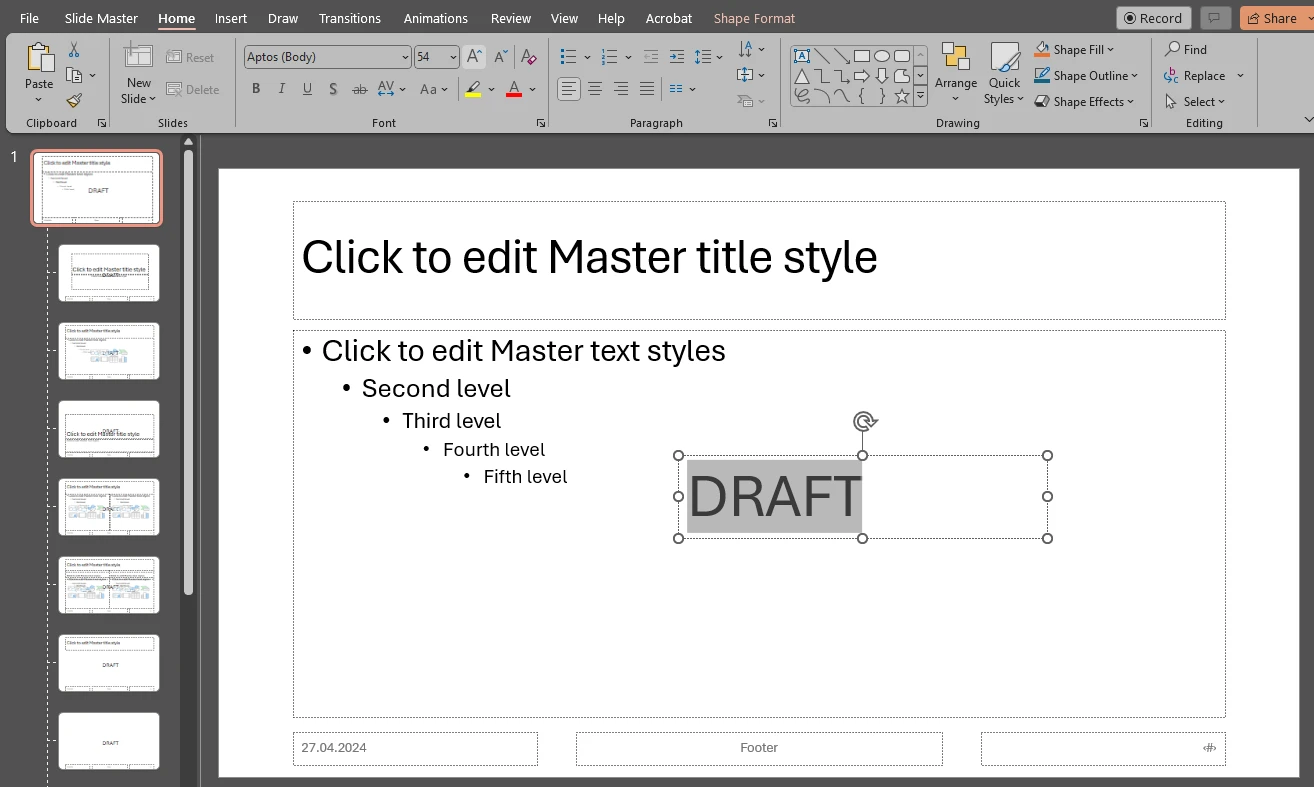
- Increase the size of your text. You can do this by clicking on the “Increase Font Size” button. Alternatively, you can enter a specific number into the size input area.
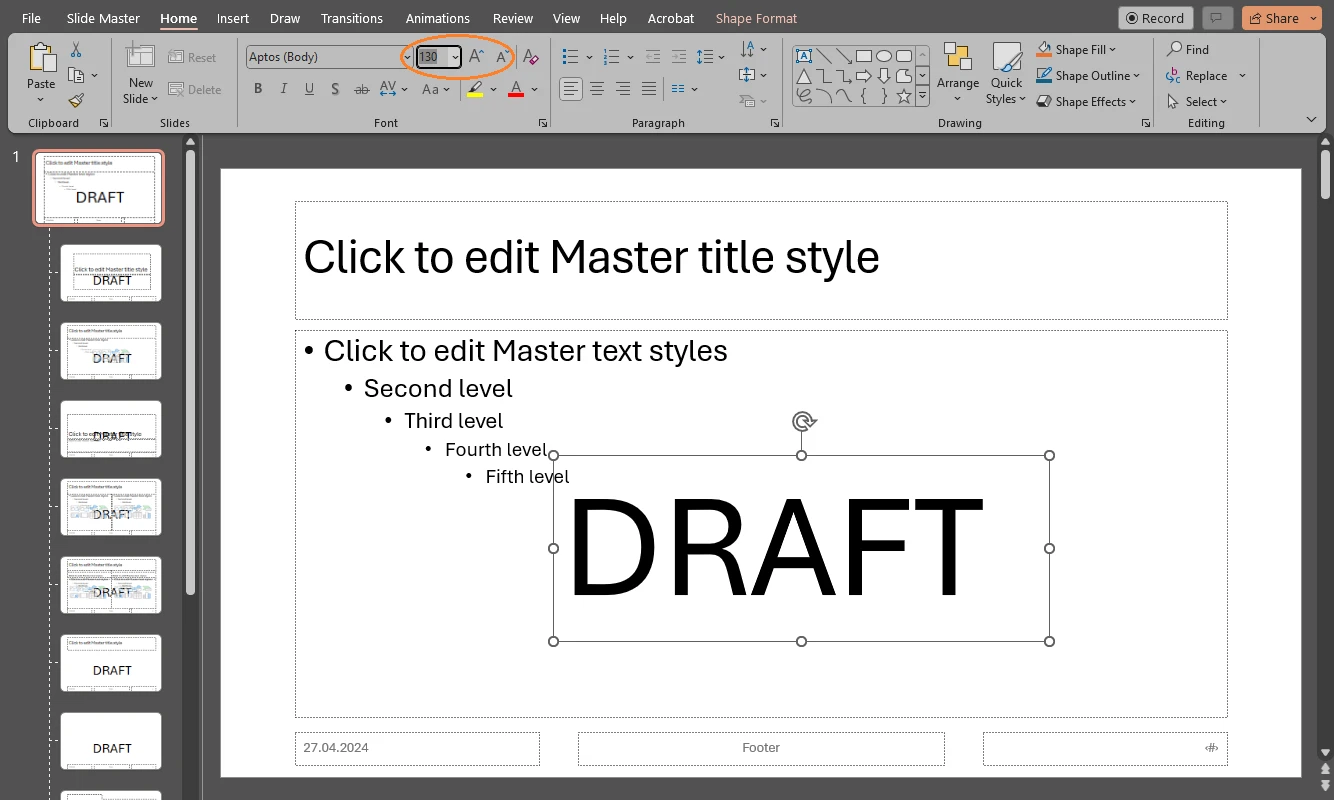
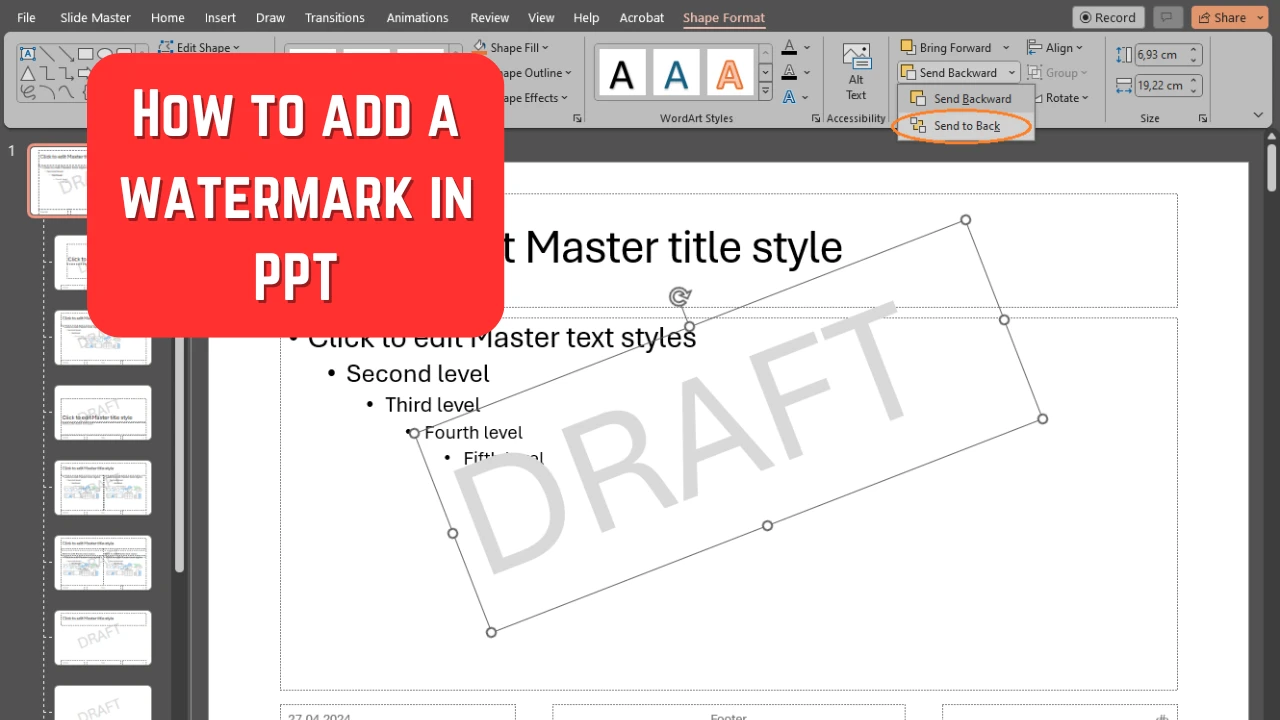
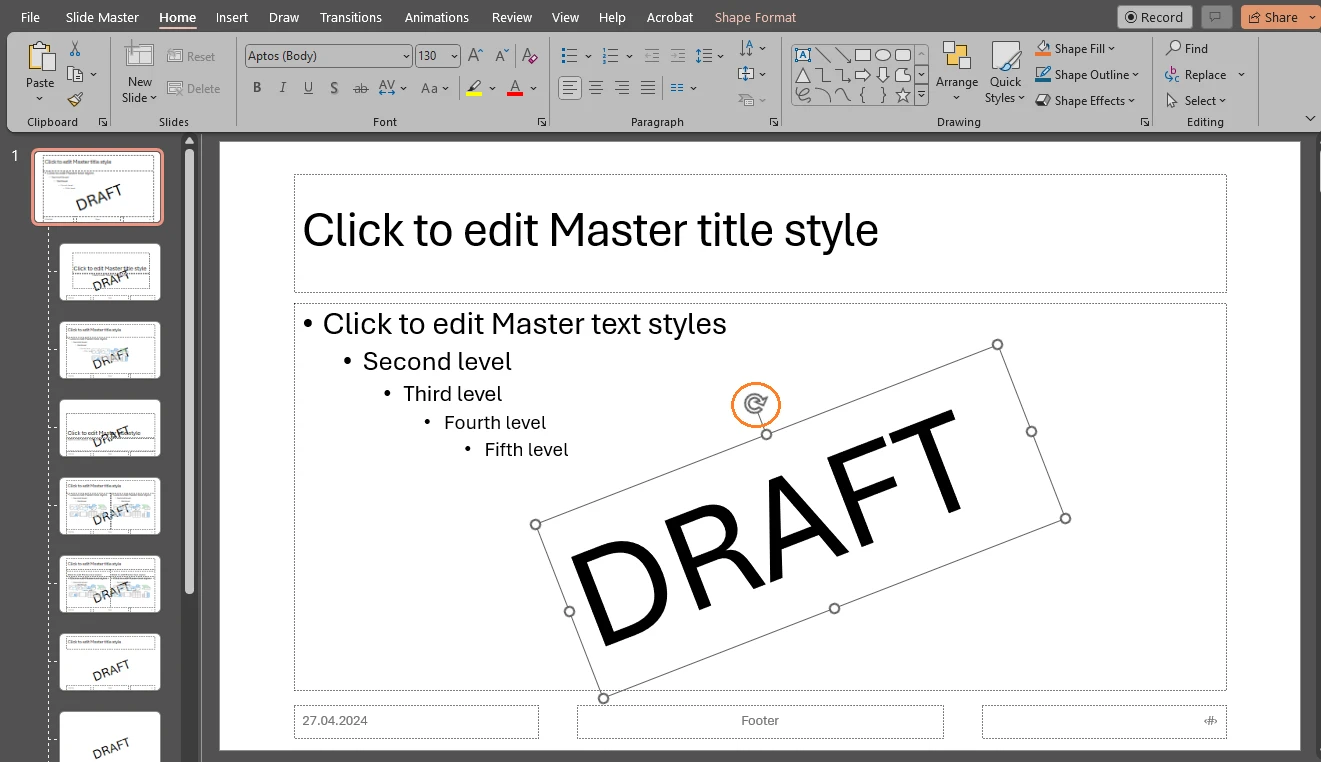
- You can reposition your watermark with the help of the cursor. Hover over the edge of the text box with the cursor and wait until it turns into a black four-headed one. Only then you’ll be able to reposition your text box. The rotation handle at the top of the text box will help you change the angle of your text. Click on it, then hold and move the mouse to the left or to the right.
- If necessary, select a different font and change the color of your text. You can right click on the text to open a small menu that has some tools for editing. If the background of your presentation is white, it might be a good idea to choose a light color. For example, this shade of white will produce a semi-transparent watermark that will blend in seamlessly with your background.
 Please, keep in mind that the color of your watermark should be determined by the design of your PowerPoint presentation and especially by the color of the background. Experiment with various shades and see which option works best for you.
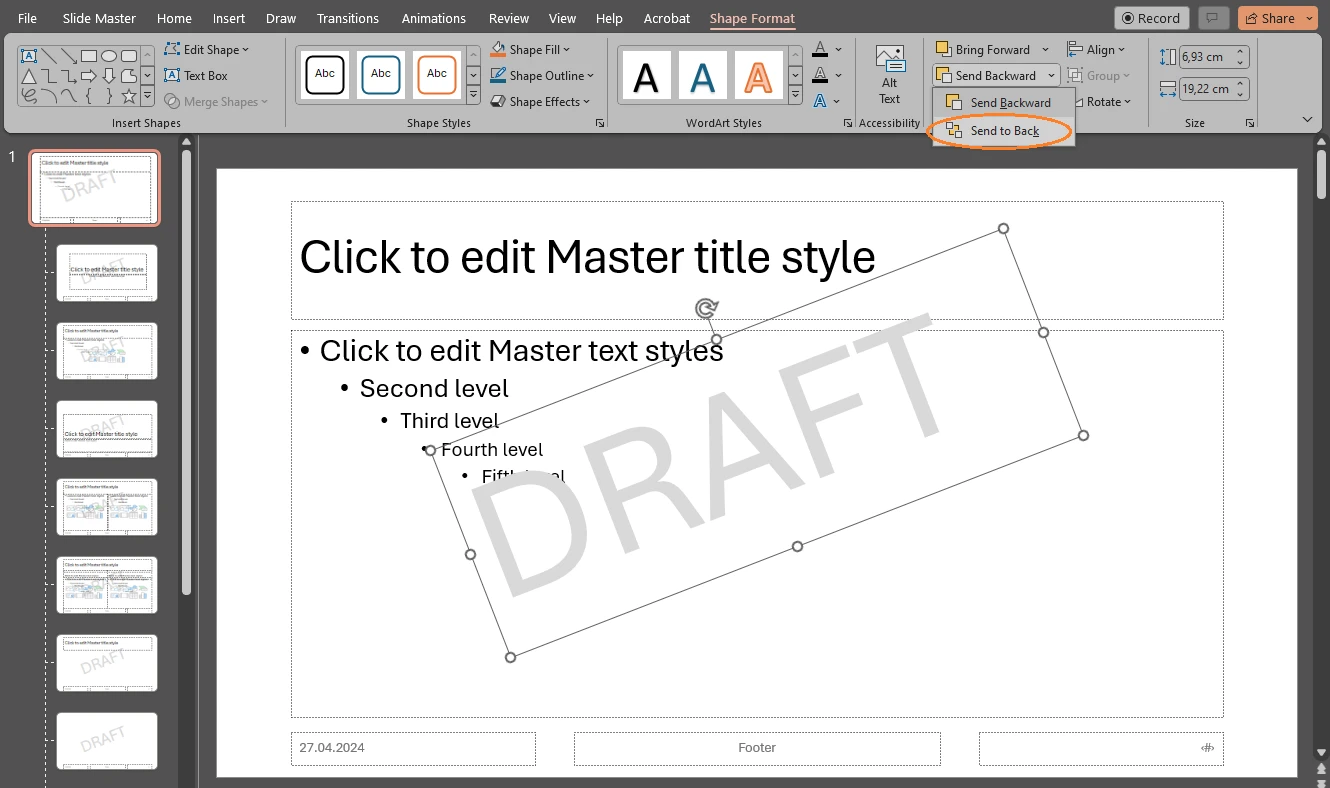
 - There’s another thing that you need to do. Right now, the text is overlapping the content of the slide, because it’s on the top layer of the slide.
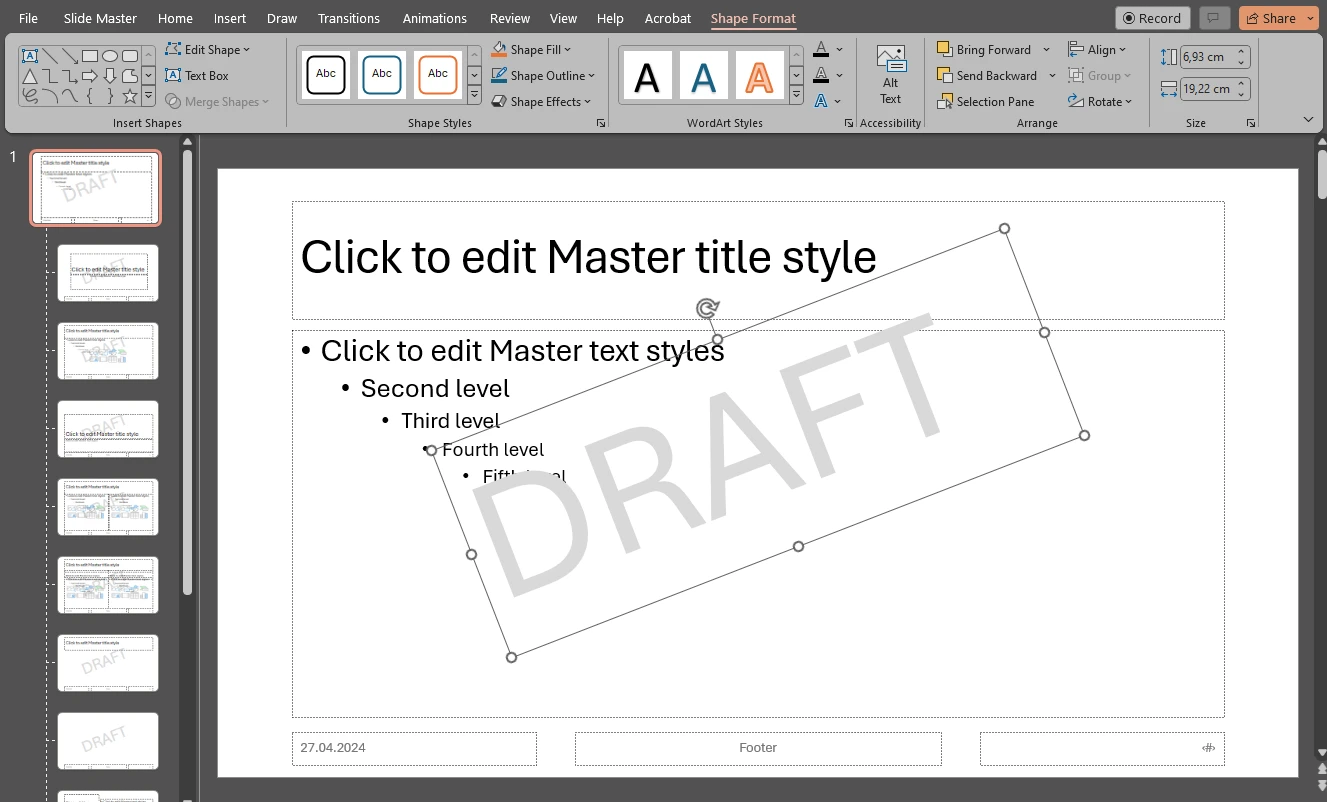
- Make sure that your text box is selected and open the Shape Format section in the ribbon. Then go to Send Backward > Send to Back. Now, your text will be in the background without overlapping your content.
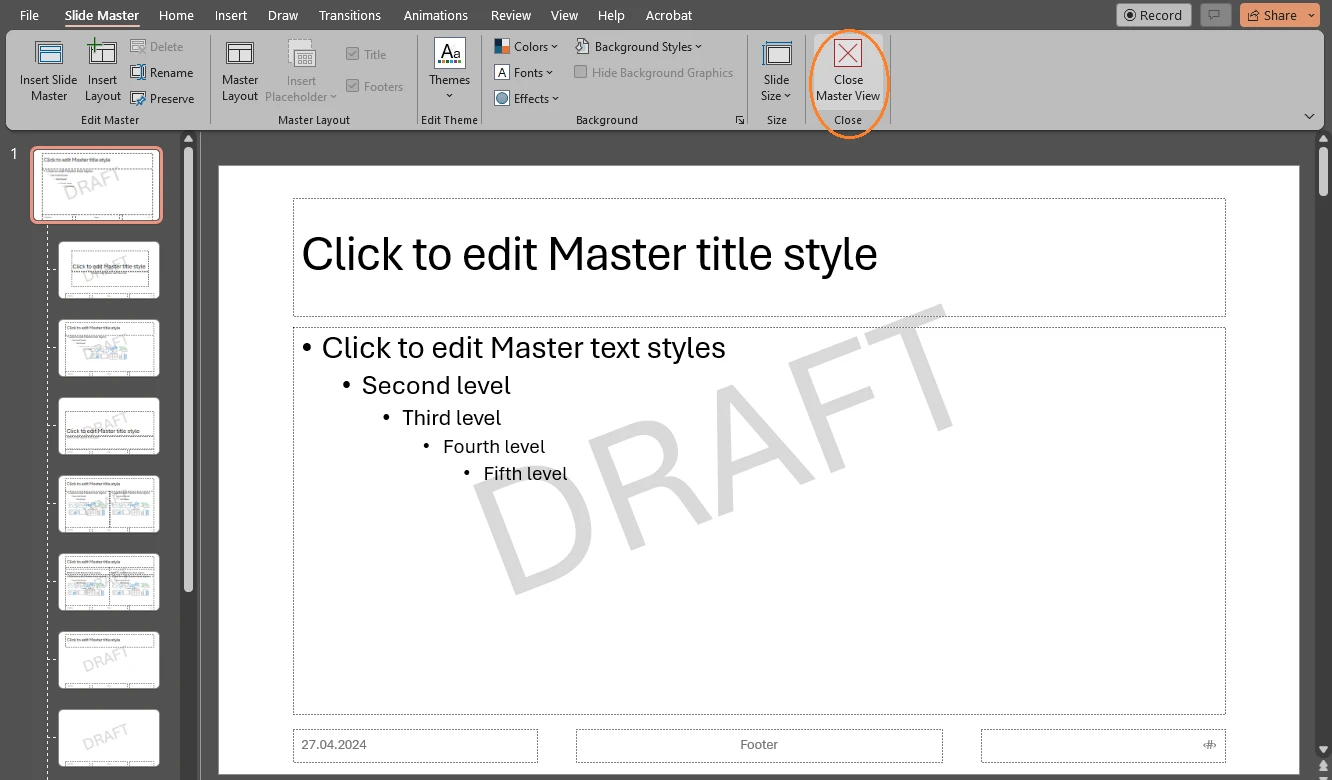
- When you are happy with the design of your watermark in PowerPoint, go to Slide Master > Close Slide Master.
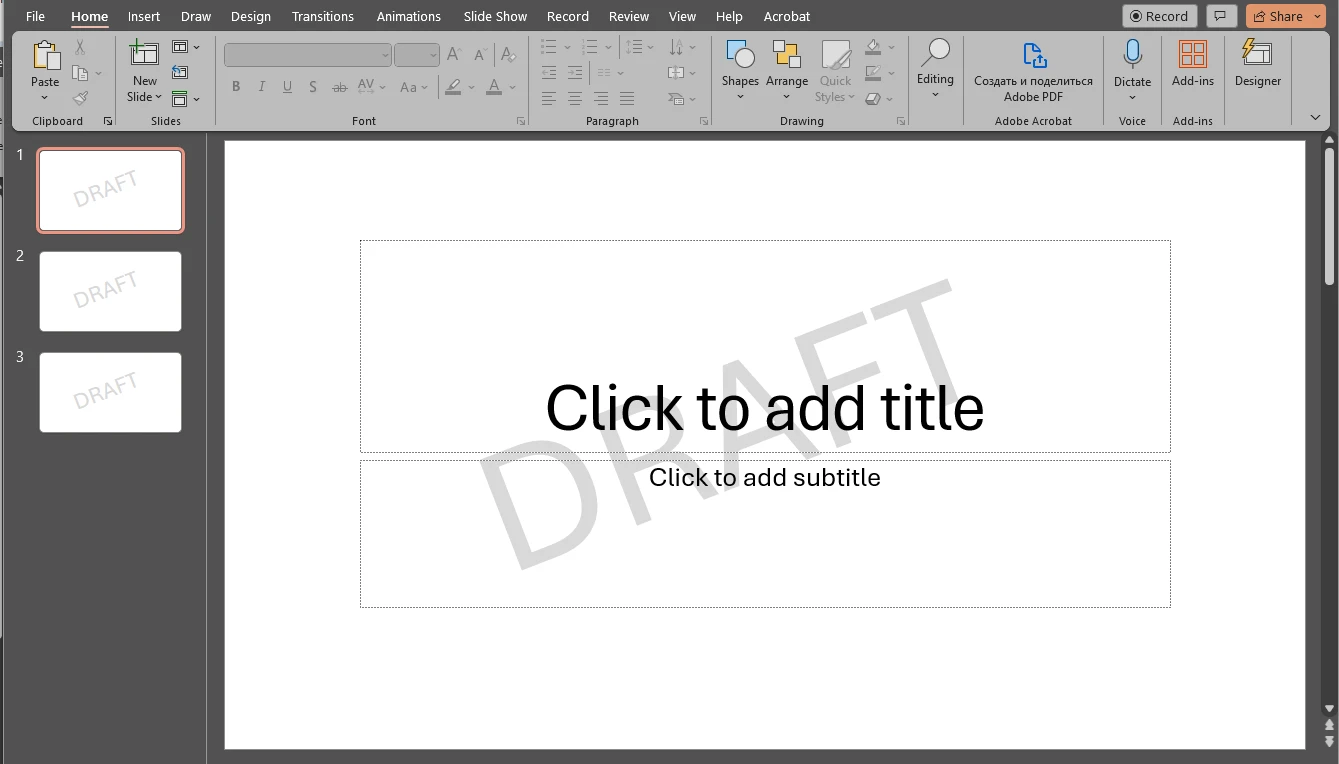
- Now, there’s a watermark on every slide. And if you add a new slide, it will have a watermark, as well.
This wasn’t very complicated, was it?
How to Add a Logo Watermark in PowerPoint
What if you have a brand logo and you want it to be in the background of your presentation? It’s not that complicated to do this, either. In fact, if you follow these steps, you’ll be able to insert any picture as a watermark in a PowerPoint presentation.
- Once your presentation is open, go to View > Slide Master. Make sure that you are on the very first slide in the thumbnail pane on the left.
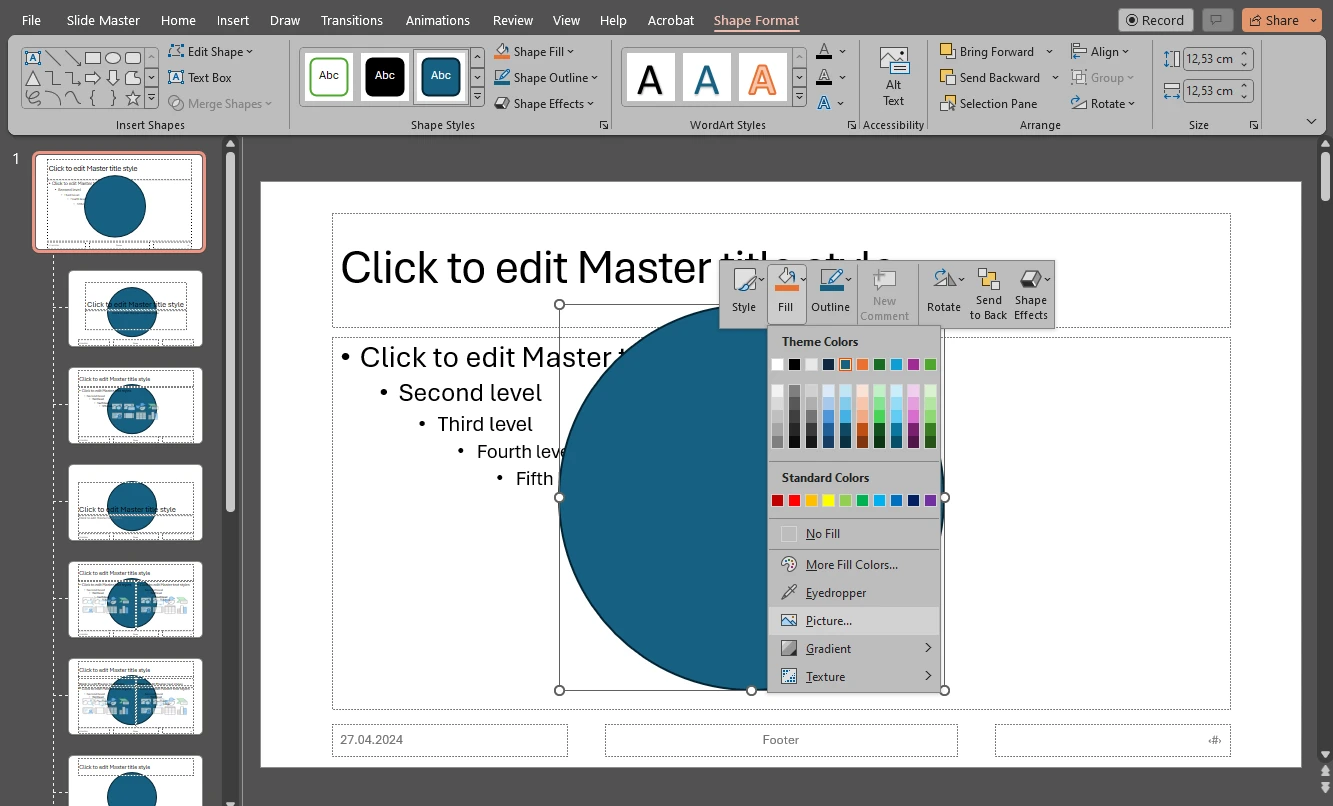
- Next, go to Insert > Shapes, then pick a shape.
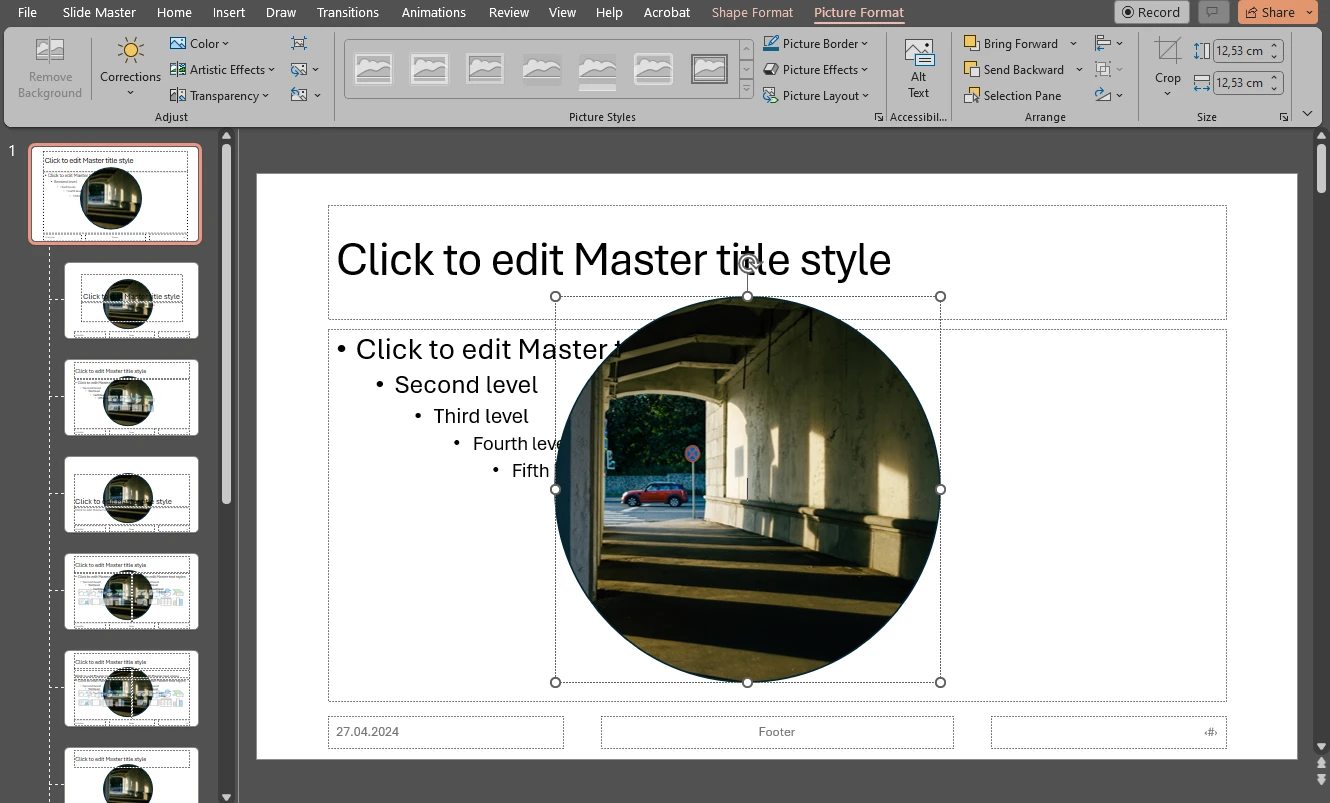
 What you need to keep in mind is that don’t just pick any shape. You need to choose the shape that you want your logo to have. If you pick the shape of a star, for instance, your logo will be star-shaped after you import it. You can use this for your advantage, though. If you want to crop an image into a circle in PowerPoint, you can select an oval, then hold “Shift” to draw a perfect circle. And after you import your image – even if it’s rectangular – it will be turned into a circle.
 - With the cursor, draw a new shape on your slide. Then right-click on it. Select Fill > Picture.
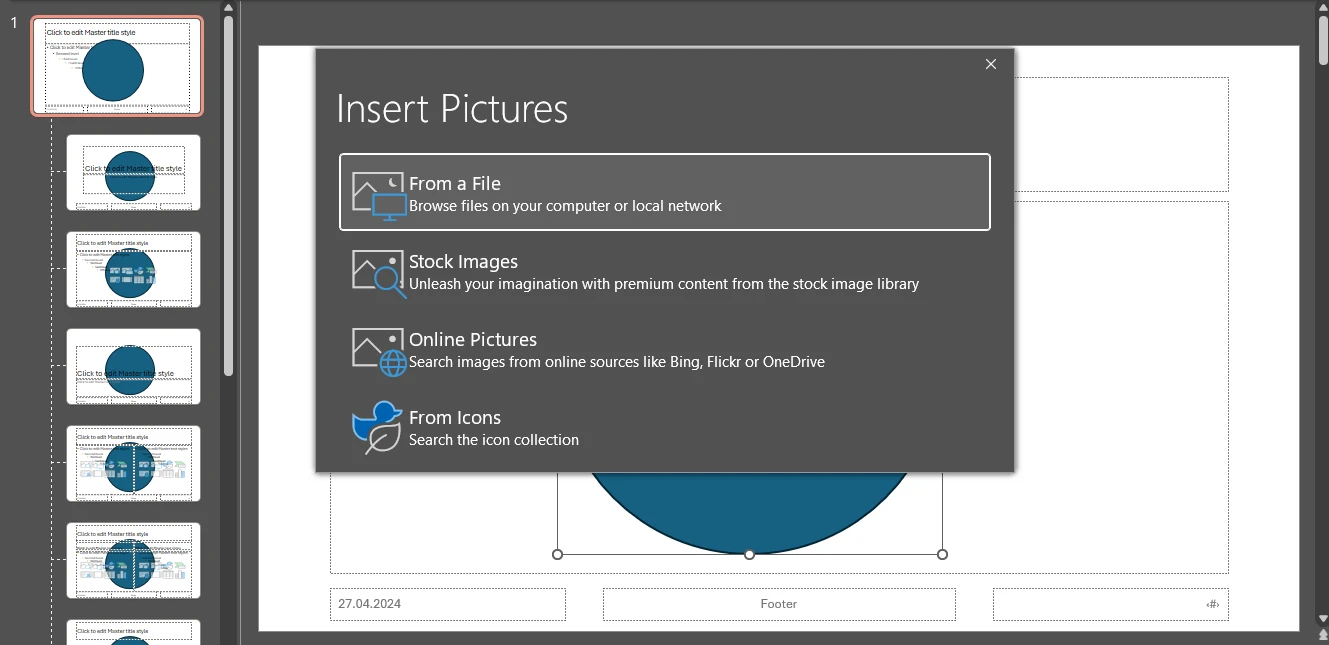
- Select where you want your image to be imported from. For instance, you can select “From a file” to upload an image from your device.
- If after the import your image got distorted or if you want to adjust its position within the shape, you can go to the Picture Format section, then select Crop > Fill.
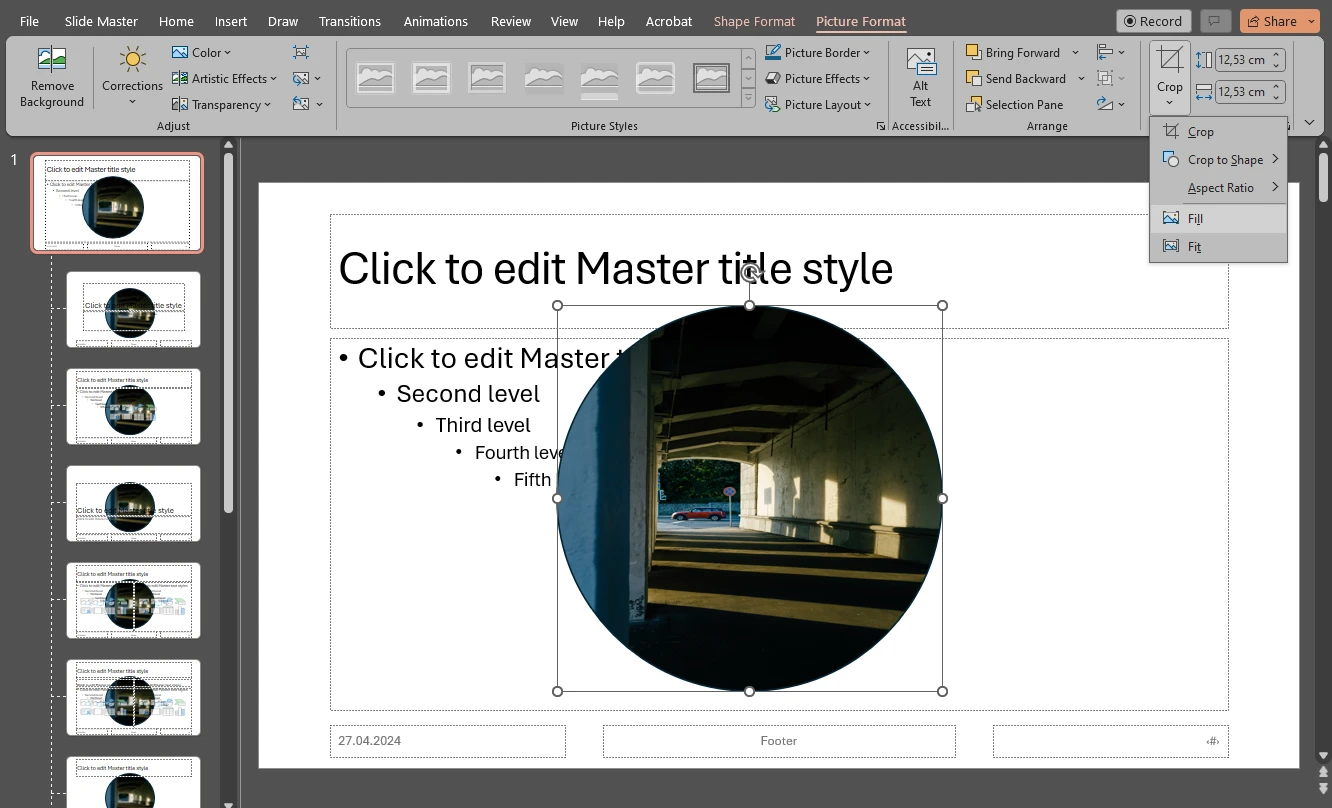
- The image won’t be distorted anymore.
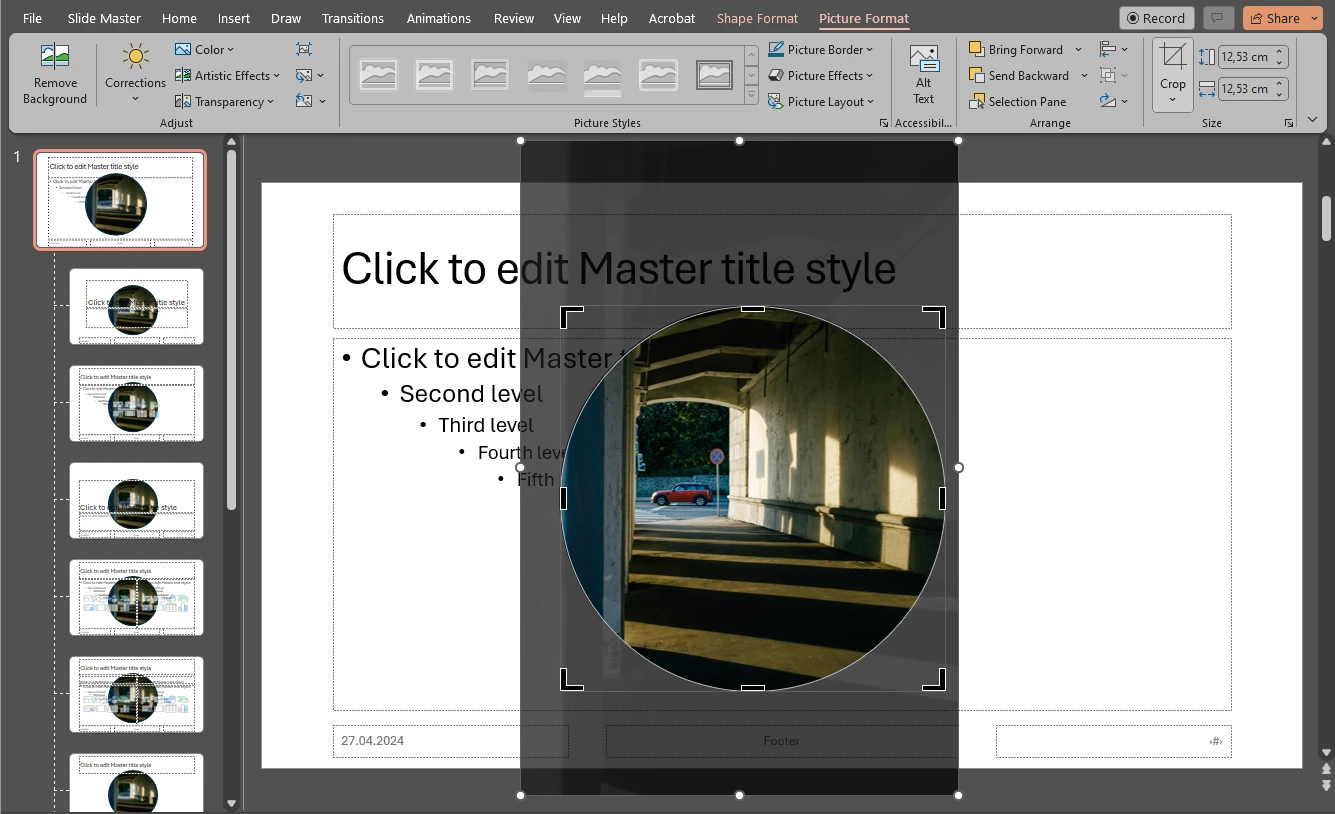
- Here you’ll be able to resize and reposition your image, as well.
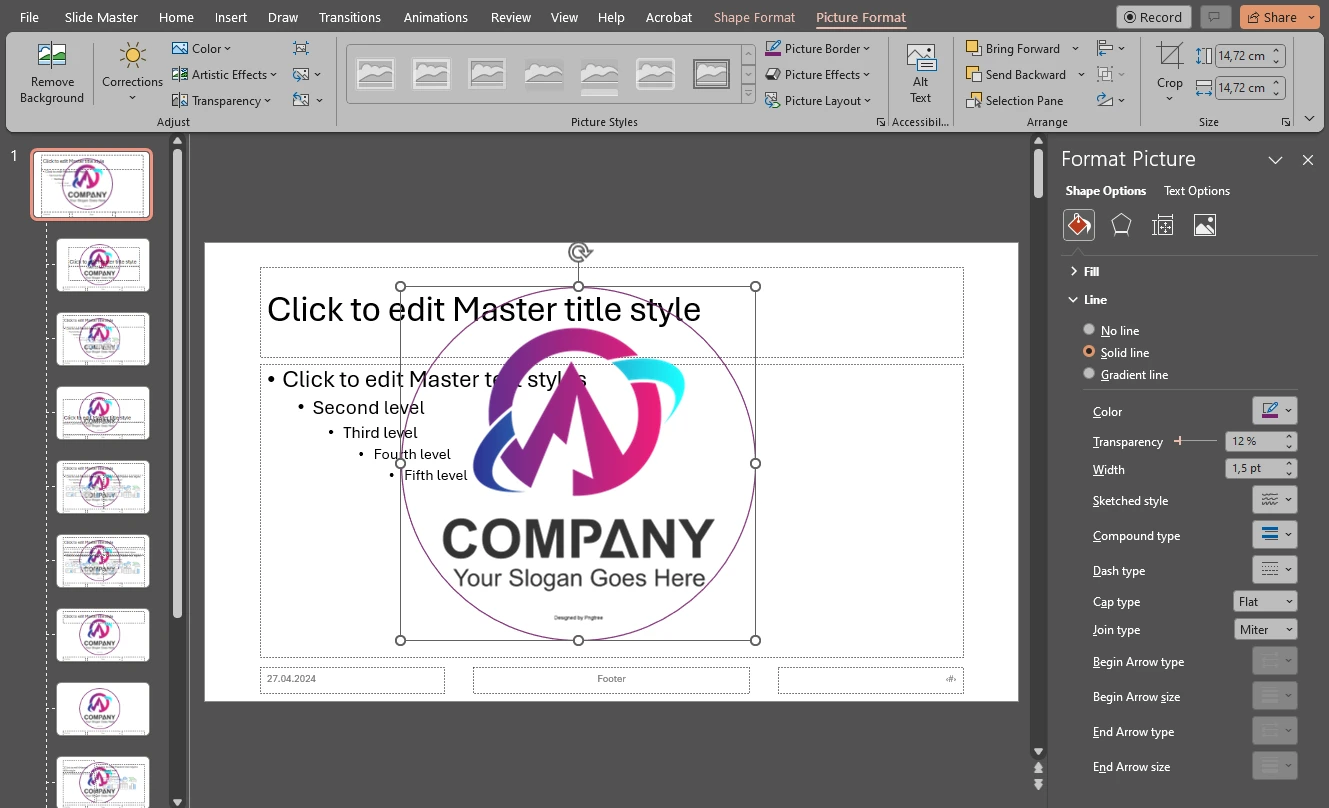
- Once your shape is filled with your imported image, you will notice that there’s a thin outline around it. You can keep it as well as adjust its color and thickness if necessary. This can be done by right-clicking on the shape and going to the Outline section.
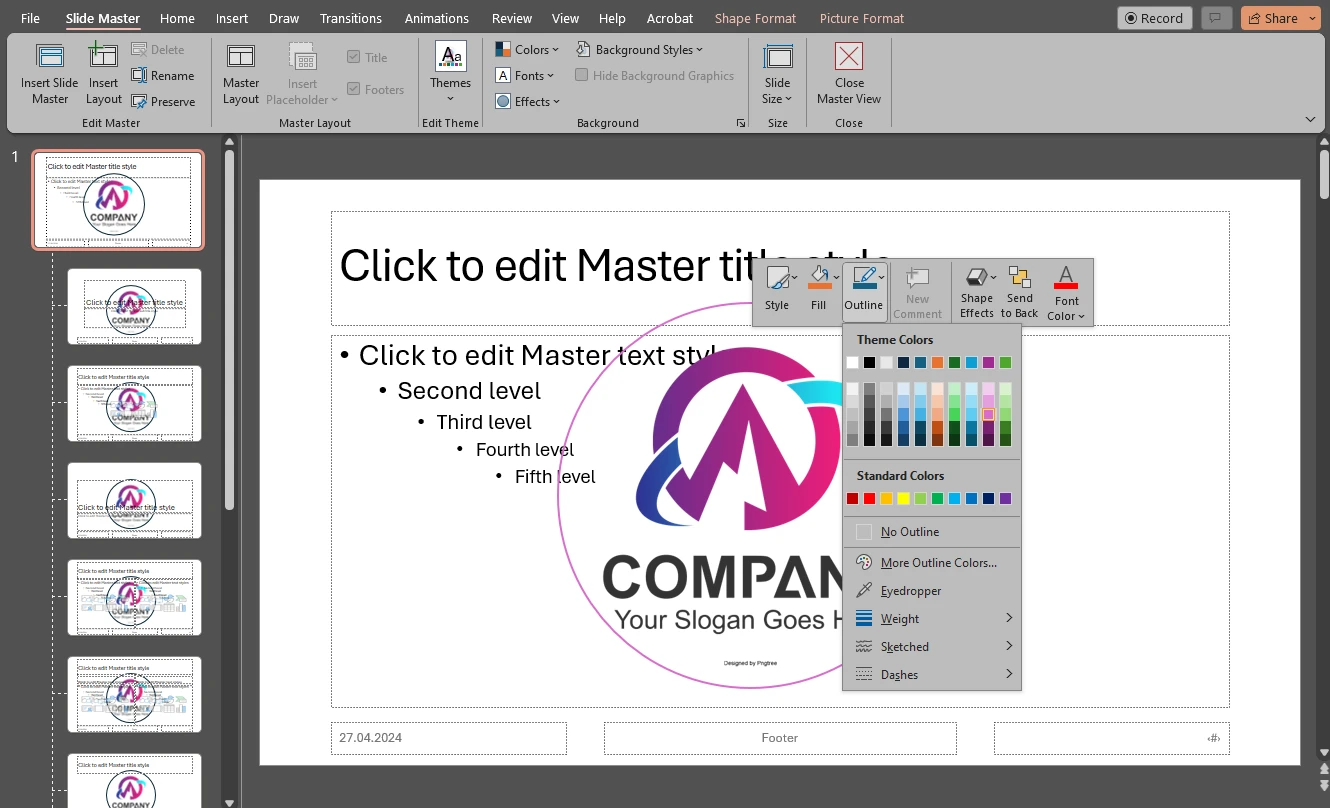
- Here, you can also get rid of the outline by choosing the “No Outline” option.

- You can reposition and resize your logo with the cursor. If you try to resize your logo by dragging the edges with the cursor, though, you will see that it can get quite distorted. Its aspect ratio can get messed up. If you want to avoid this, hold “Shift” while you are resizing your logo.
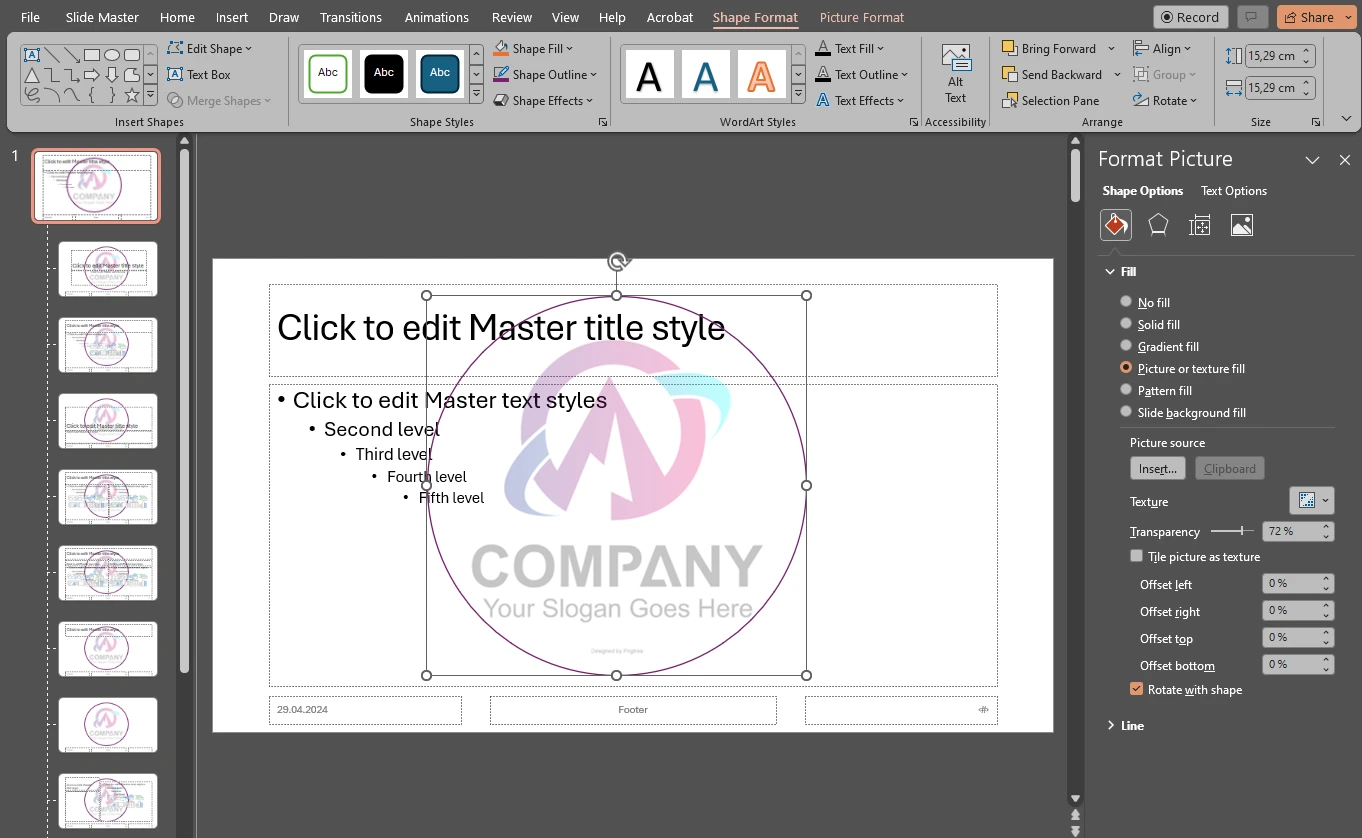
- You can make your logo more transparent in the Picture Format section. Click on “Transparency” and pick the necessary level of transparency.
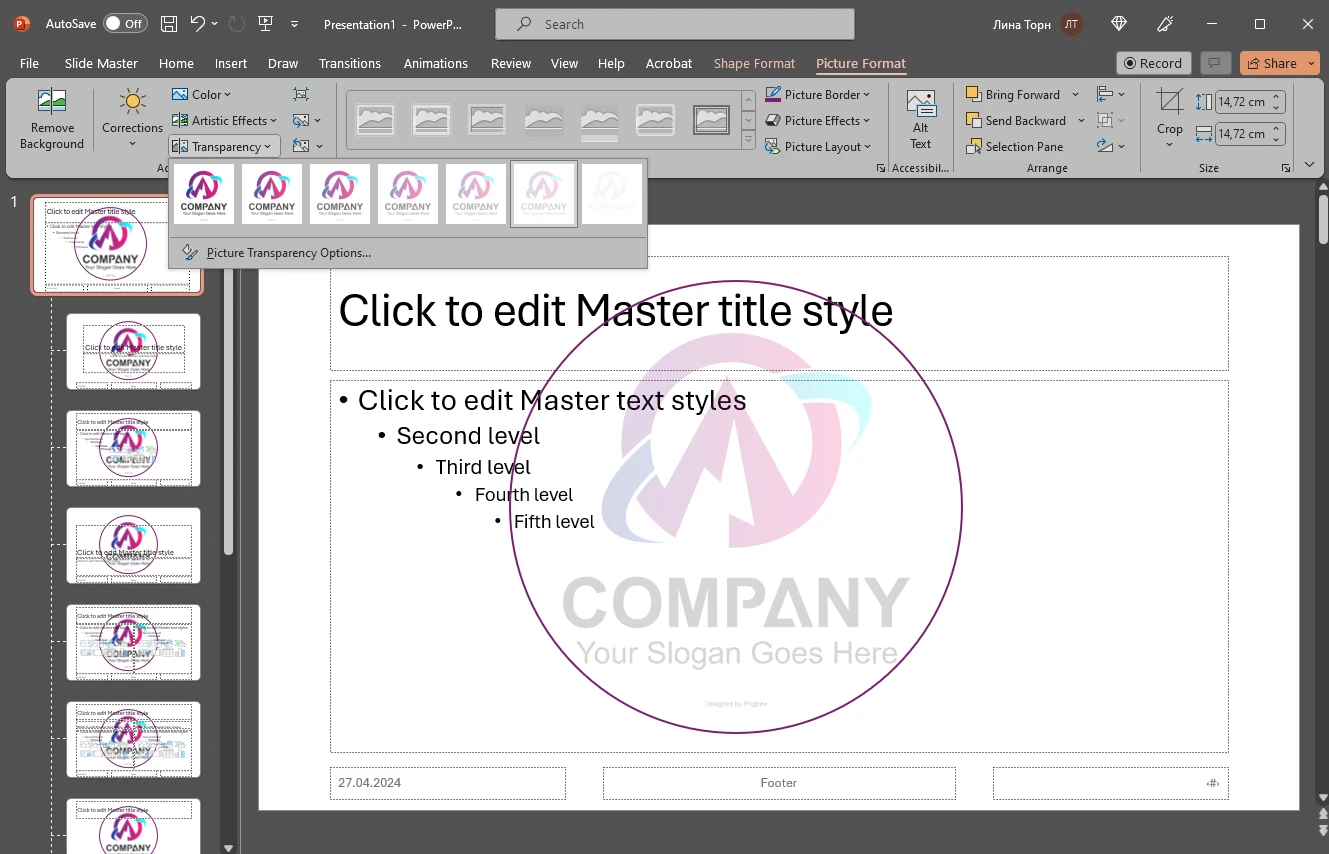
- You can also choose “Picture Transparency Options”. This will open the “Format Picture” section on the right. Here you can increase or decrease the transparency by a certain number of percent which will give you more control of how transparent your logo is.
- Please note that here you can adjust only the transparency of your logo. If you have an outline, you will need to adjust its transparency separately. Go to Shape Options > Line and toggle the Transparency slider.
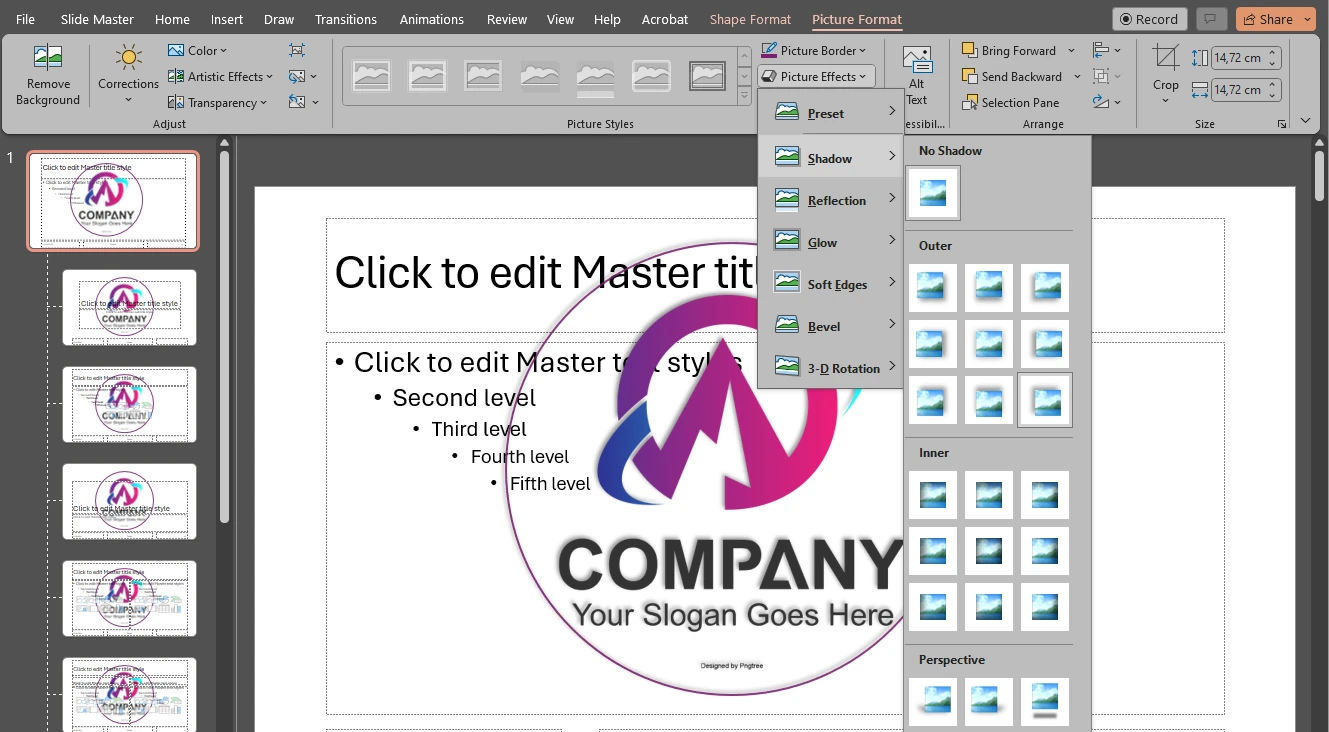
- If you go to the “Shape effects” menu, you can also add an effect to your logo.
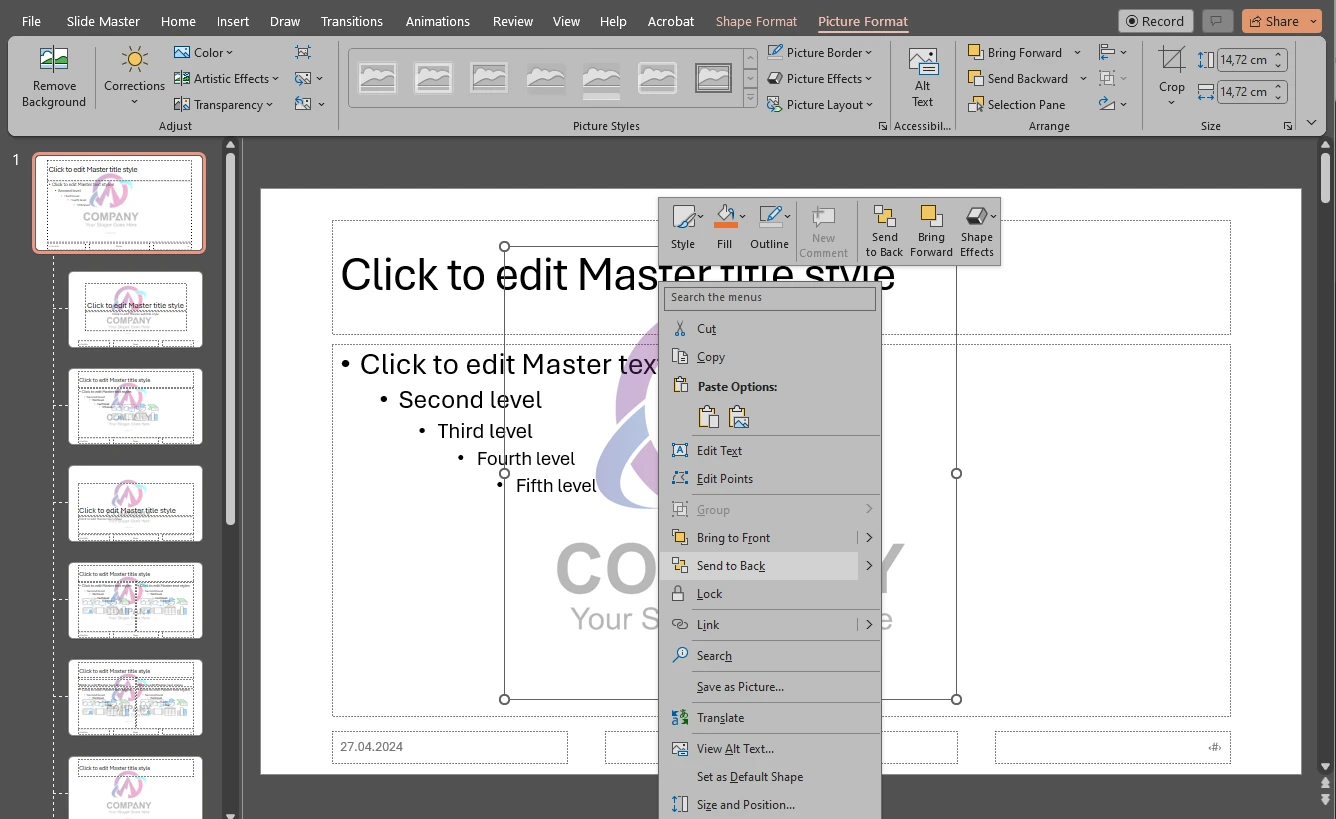
- Finally, to put your watermark behind the content of your slides, right click on it and select “Send to Back”.
- Once you’re done with editing your logo, go to Slide Master > Close Master View. Now, every slide has your logo in the background!
Here’s a tip!
It’s possible to add a watermark only to certain types of slides. In other words, you can watermark only selected slides in PowerPoint. You can do this in the Slide Master, as well. Here’s how you can watermark selected slides in PowerPoint:
- In the Slide Master, right-click on your watermark and copy it. Then remove the watermark from the very first slide. Simply press “Delete” to do this.
- In the thumbnail pane you will see different types of slides. Click on any slide you want, then insert your copied watermark.
- You can watermark specific types of PowerPoint slides in the Slide Master. Plus, you can experiment with the placement, the design and the size of your watermark.
- Exit the Slide master. Now, if you try to add a new slide, you’ll see that only some types of slides will have a watermark.
Watermark Photos in PowerPoint
So far we’ve talked about watermarking the slides themselves. But what if there are images in your presentation and you want to protect them with a watermark, too? Let’s see how you can do this:
- Open a blank slide in PowerPoint. Make sure that there’s nothing else on your slide. No text boxes. No titles. Just a completely blank slide.

- Go to Insert > Pictures. Pick where you want to source your image from and import it.

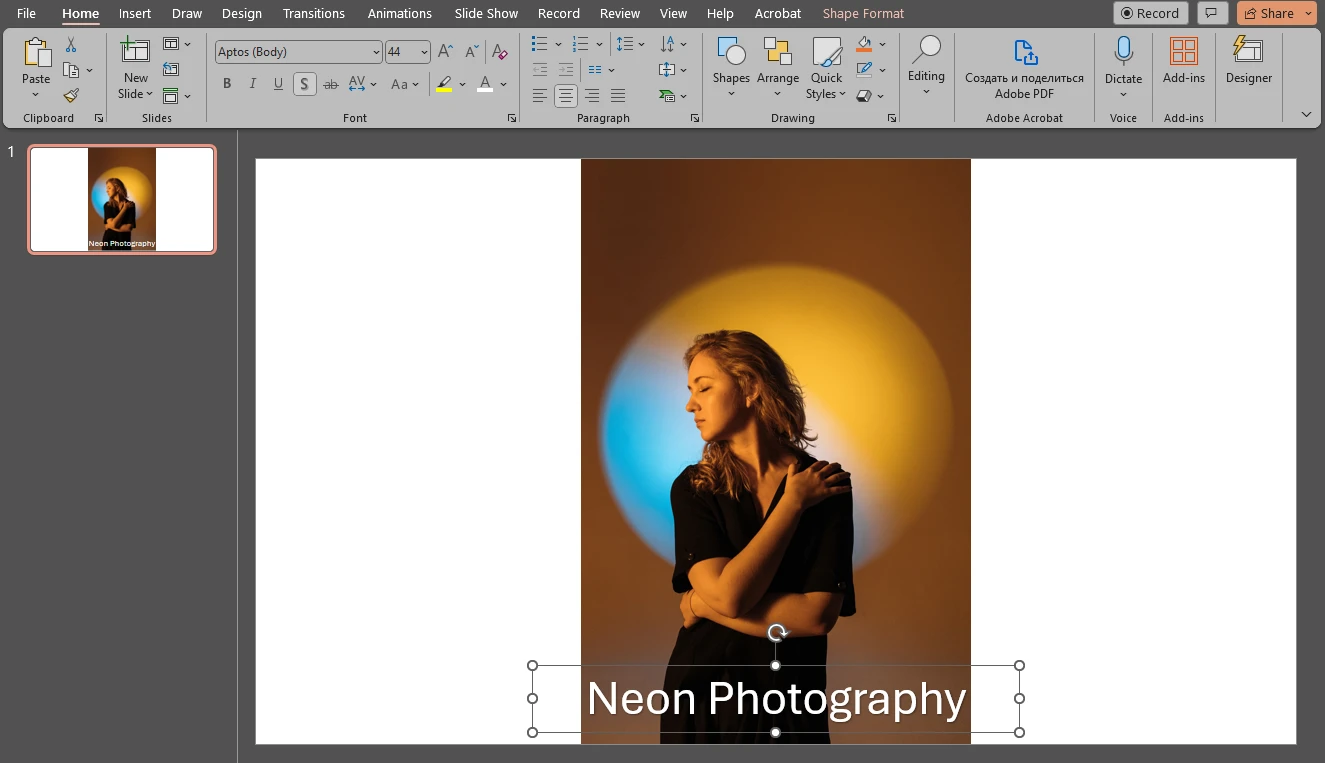
- Go to the Insert section again. Pick the “WordArt” option and choose which text style you want.
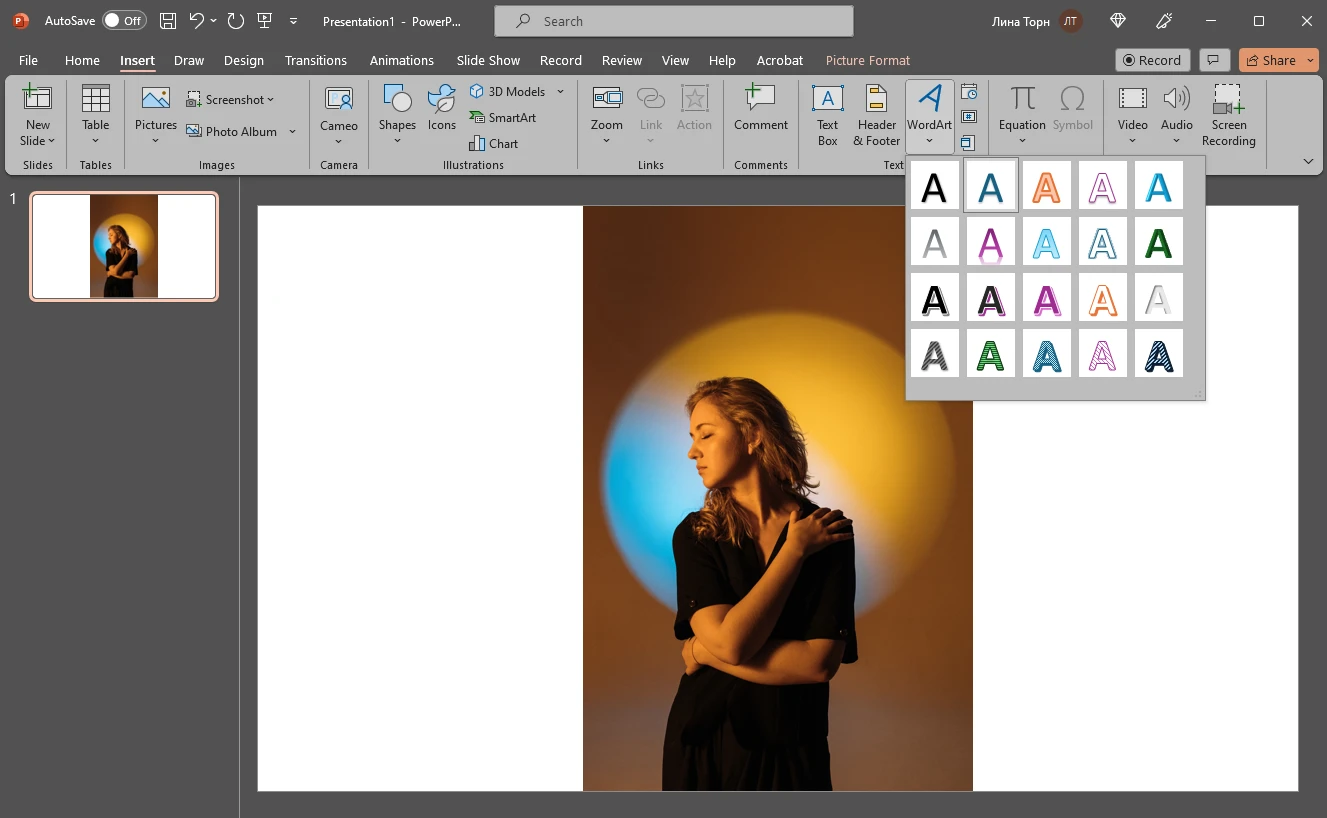
- Once you see the text box appear, type in the necessary text. It can be your brand name, for instance.

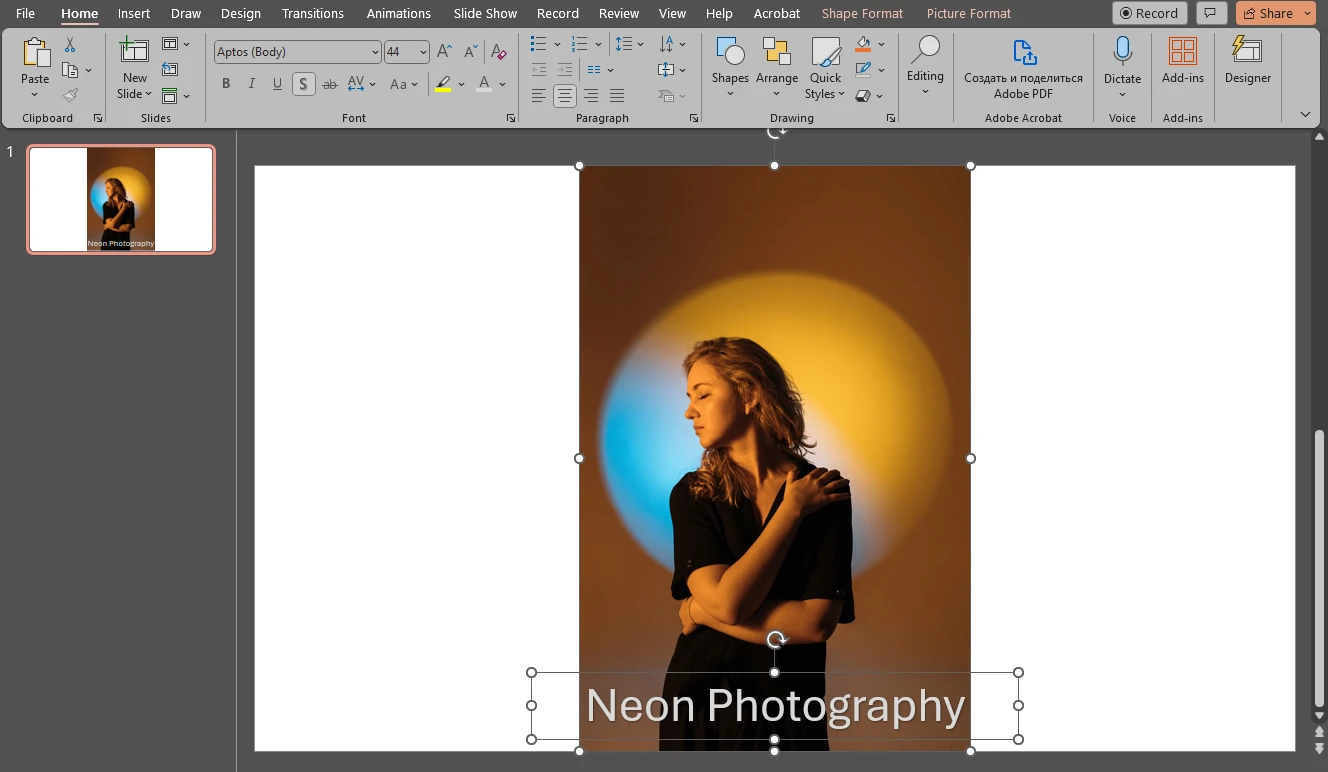
- Resize and reposition your watermark. Edit your watermark however you want.
- To adjust the transparency of your textual watermark, right-click on it and select “Format Shape”.

- In the Format Shape section, click on the “Text Options” and select the first tab. In the Text Fill, select “Solid Fill” and adjust the level of transparency.

- If you want to, you can experiment with other options. For instance, you can opt for a gradient fill. Make sure that all the text is selected for this.

- Your text can also have an outline or no outline. And you can add an effect to your text, too. Both of these things can be done in the Format Shape section.

- Close the Format Shape Section and press CTRL + A. This will select both the textual watermark and the image. It’s important for both items to be selected!
- Go to the Shape Format section. Go to Group > Group.
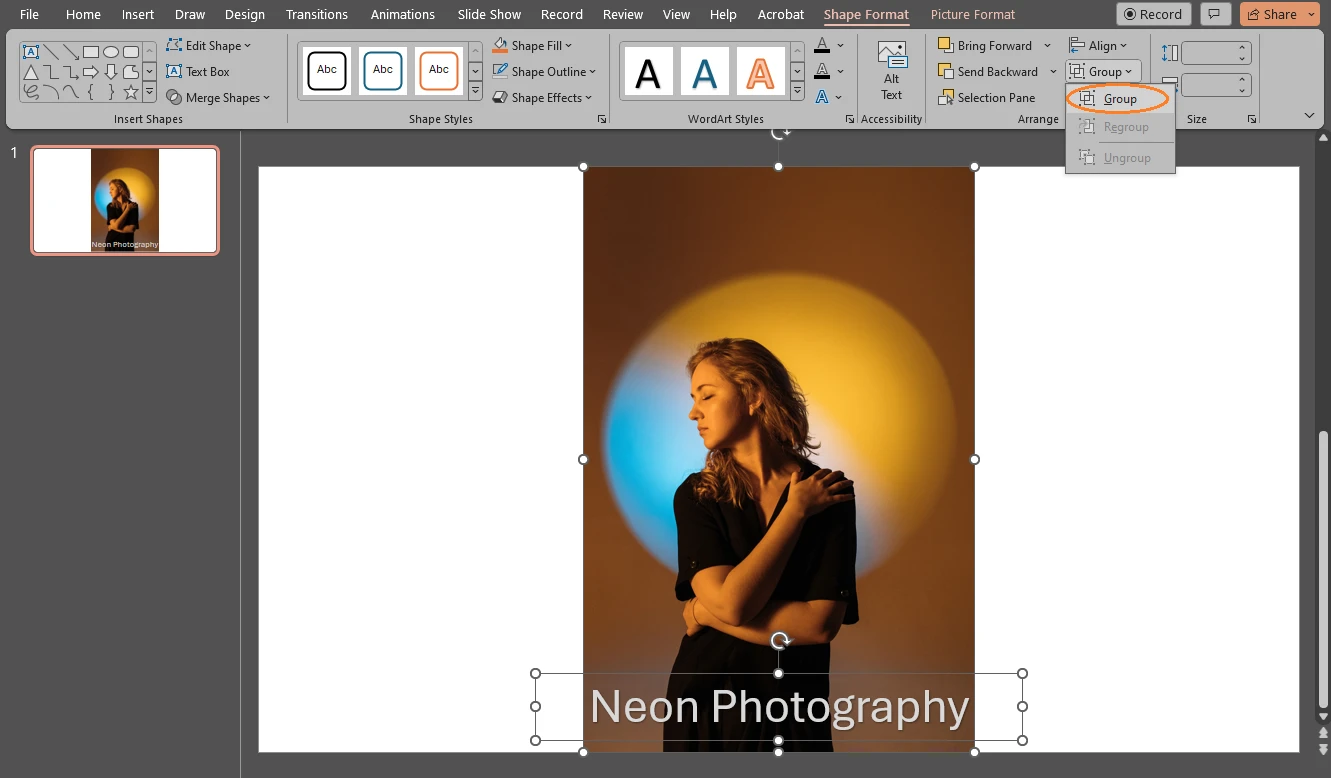
- Your image and text will be grouped now!
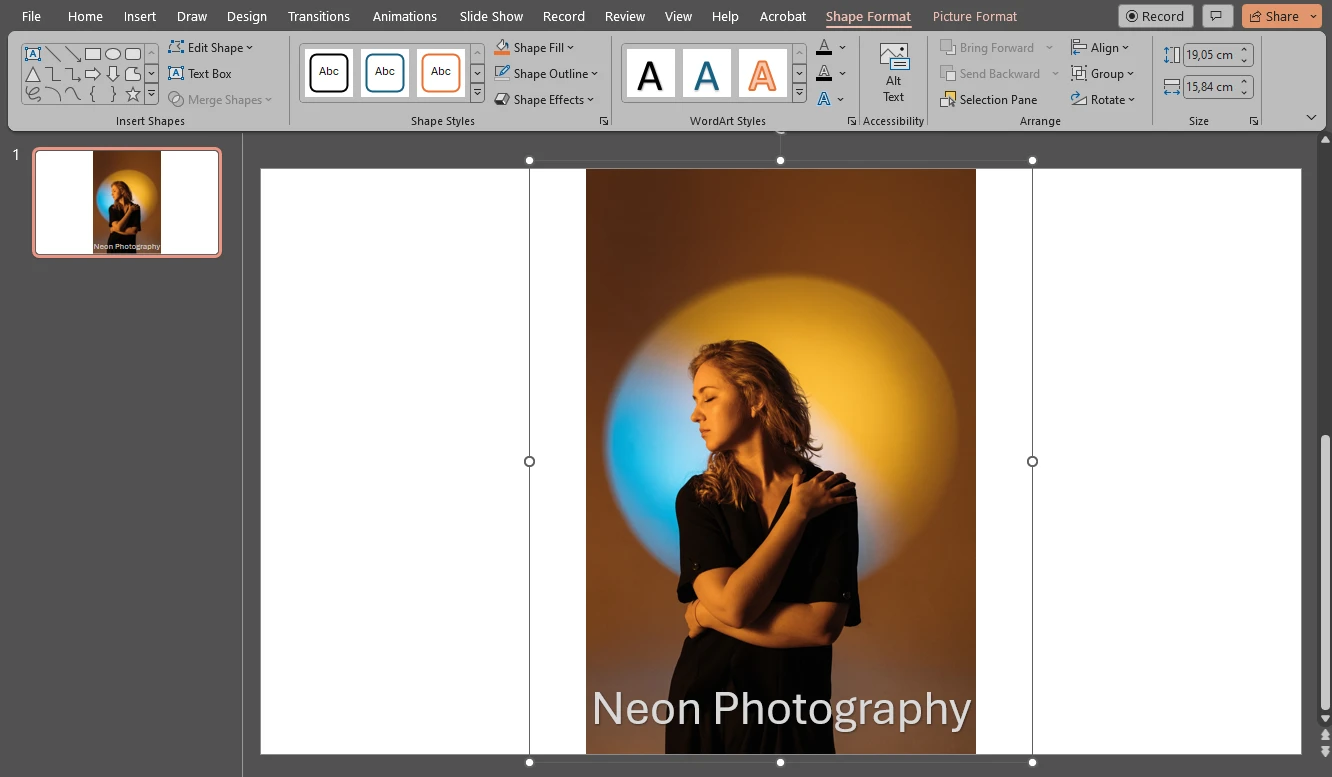
- Right click on your image with the watermark and select “Save as Picture”.
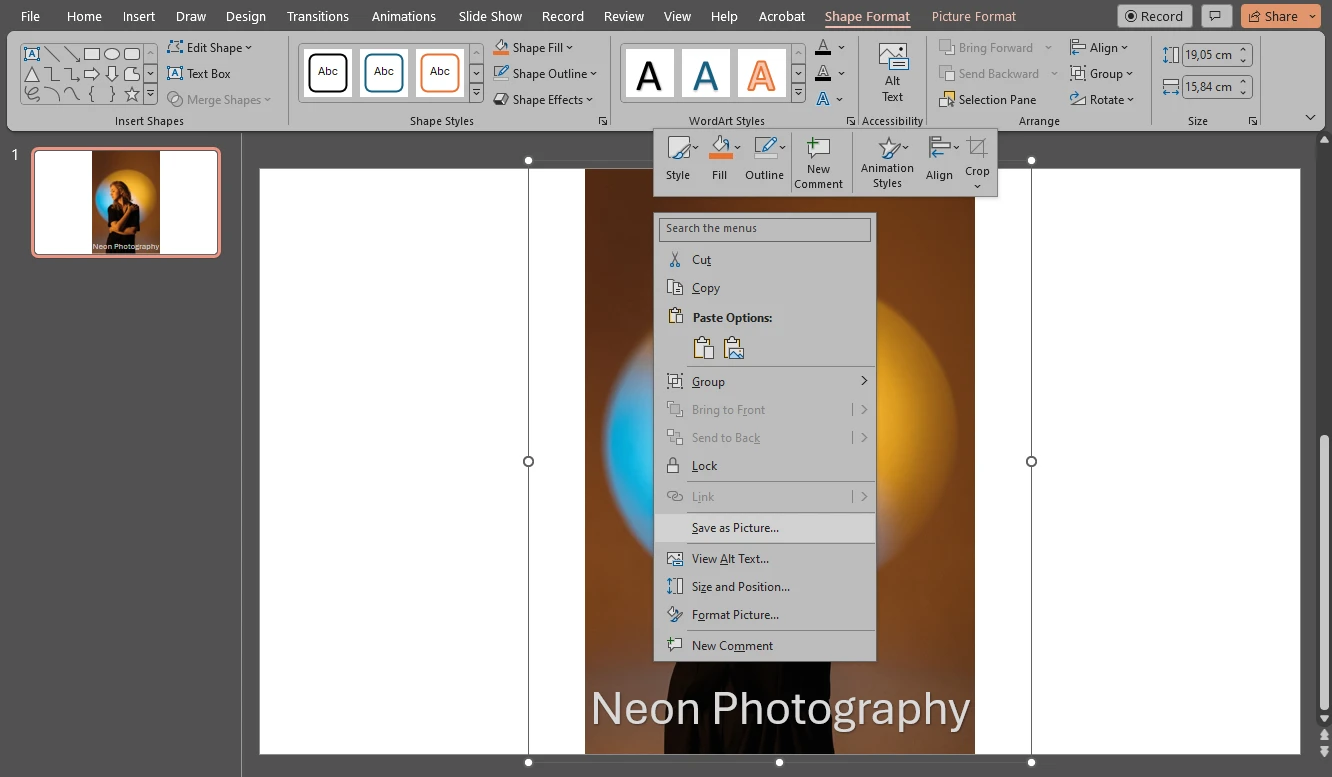
- Export your watermarked photo to your device. Voila, now you know how to watermark a photo in PowerPoint.
If you realized that you want to make adjustments to your watermark in PowerPoint or if there’s another image that you want to watermark, here’s what you need to do:
- Select your watermarked image and go to the Picture Format, then select Group > Ungroup.
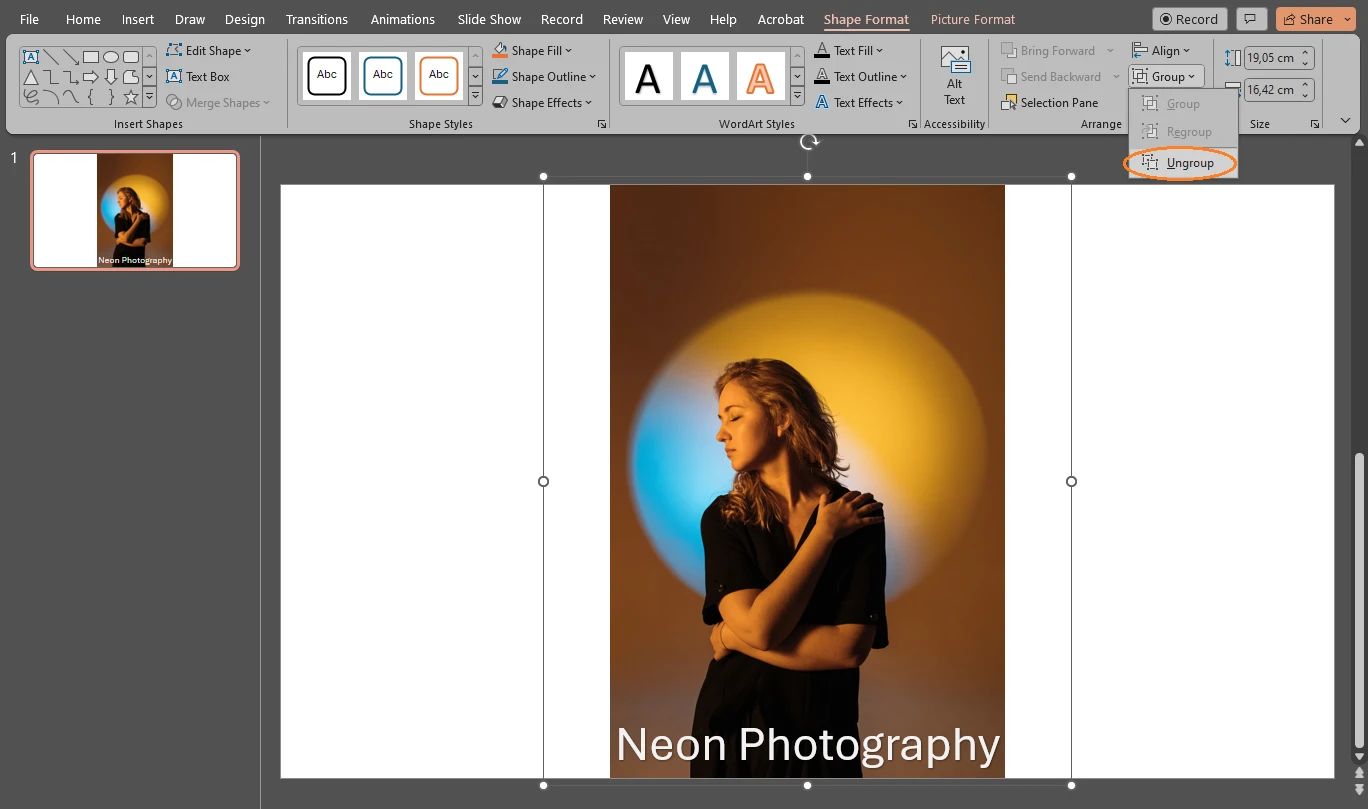
- Your image and your watermark won’t be a single item anymore. Unselect them by clicking anywhere on the slide. Now, click on the picture to select it. Make sure that only the image is selected.

- Press “Delete” to remove the image.

- Go to Insert > Pictures, then add a new photo to your slide.
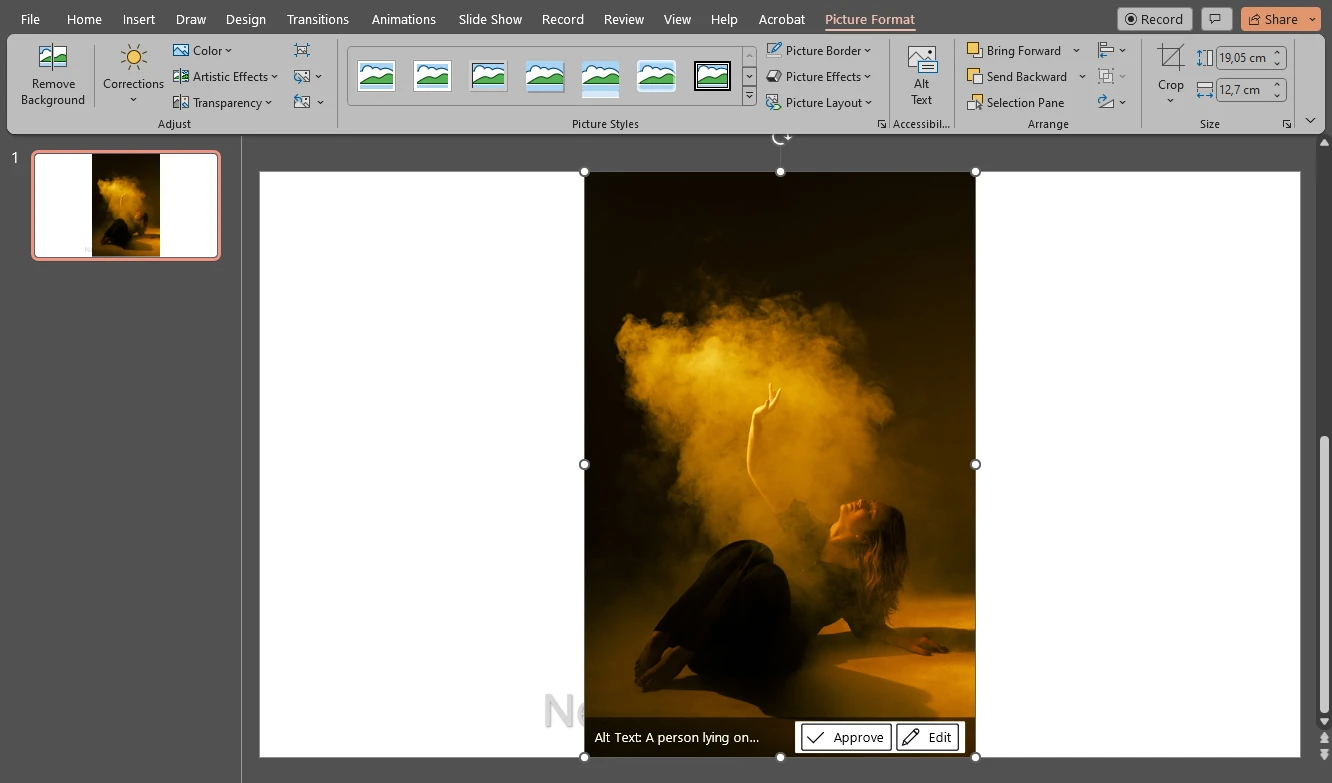
- A new image will appear in front of your watermark. It’s possible that you won’t even see it. To fix this, right-click on the image and click on “Send to Back”. Your watermark will now be in front of your image again.
- Adjust the size and placement of your watermark. Make any other adjustments to it if necessary.
- Once you are done, press CTRL + A to select both items. Go to Shape Format > Group > Group. Now you watermarked another image! If necessary, save it to your device in the same way as you saved the first watermarked image.
How to Improve the Protection of your PowerPoint Presentation
As you can see, adding a watermark to a PowerPoint presentation isn’t extremely difficult or complicated. You can add some text or a logo to every slide within a couple of minutes. On top of this, PowerPoint isn’t an advanced software. It’s quite easy to master. If all you require is to insert watermarks in PowerPoint presentations, it’s easy to do this in the program itself; there’s no need to look for any third-party apps.
There’s a downside, though.
Even though the main purpose of a watermark is to protect your content and prevent unauthorized use, PowerPoint watermarks don’t provide as much protection as you might want.
Surely, it’s possible to restrict editing in PowerPoint. There’s a read-only mode, for instance. However, this mode doesn’t offer any encryption and as a result, it won’t take long to disable it. And, obviously, once this mode is disabled, anyone will be able to edit your PowerPoint file. It means that they can easily go to the Slide Master and remove all of your watermarks.
If you want to avoid this, you can save your PPT presentation as a PDF file.
As you may know, contents of a PDF file tend to be challenging to edit, including watermarks. Naturally, it’s impossible to show a PDF file as a presentation. But if you need to share the actual file that contains your presentation with others, it might be a good idea to save a copy of your PowerPoint presentation as a PDF file and share this very file with others, while keeping the editable PPT file only to yourself. This way, no one will be able to remove your watermark.
What’s more, Watermarkly has two browser-based apps for watermarking – one for watermarking photos and the other one for watermarking PDFs. Thus, you won’t have to deal with watermarking your PPT presentation. You can simply convert your presentation to a PDF file, then upload your PDF into our watermarking app and watermark it there. Watermarkly allows you to add both some text and a logo. You’ll be able to upload your own logo file or pick an icon from the Logo Gallery. However, please note that Watermarkly doesn’t support any of the PowerPoint formats. So, you can only watermark your PPT presentation if you save it as a PDF file.
PowerPoint gives you some basic tools for designing a watermark. However, you will have much more room for experimentation with Watermarkly. You will have access to a broader toolkit for editing your watermarks. There’s a tile option that allows you to fill your image or PDF pages with repeated watermarks. This will provide you with maximum protection. Not to mention that it can be quite tedious to create repeated watermarks in PowerPoint because you will need to do it manually. You can also add one of several effects to your watermark. For instance, it can look like a 3D watermark. This cannot be done in PowerPoint.

As another layer of protection, you can actually add a watermark not only to your slides, but to images in your presentation, as well. Removing watermarks from photos is extremely challenging; especially if you follow some tips that will help you improve your watermark protection. If you poured a lot of work into your presentation and want to protect it as much as possible, you should watermark photos before inserting them into your presentation.
Watermarkly’s main advantage is that it has batch-processing. Surely, in PowerPoint, you can add a watermark to every single slide in a matter of a few clicks. But you can watermark only one image at a time. Not to mention that you’ll have to create a separate blank slide for this. If you have a lot of images in your PowerPoint presentation and want to watermark all of them, this will be incredibly time-consuming. On the other hand, in Watermarkly, watermarking a batch of images requires neither much time nor effort.
FAQ
How to add a Draft watermark to your PowerPoint slide?
This is much easier than it seems. First, you need to open your presentation or create a new one, then open the Slide Master by going to View > Slide Master. Make sure that you are on the very first slide at the top. Next, go to “Insert” and pick the “Word Art”, then select the font style. A text box will now appear on your slide. Type in the word “DRAFT” into the text box. Edit your text – make it bigger or smaller, adjust its angle, reposition it. You can make your text semi-transparent in the Text Options in the Format Shape section. Plus, you can right-click on the text and there will be some editing options in the menu. Finally, exit the Slide Master.
How to create a transparent watermark in PowerPoint?
If you want to make a semi-transparent or almost completely transparent watermark, here’s how you can do it:
- Go to View > Slide Master, then pick the first slide in the thumbnail pane on the left.
- Go to the Insert section and pick the “Word Art”, then choose the font style that you like.
- Enter your text and edit it, if necessary.
- Right-click on the text and select Format Shape.
- In the “Format Shape” section pick the “Text Options” tab, then set the transparency to 80-90% in the “Text Fill”. It’s also a good idea to experiment with the level of transparency here.
- When your watermark looks the way you want it to, close the Format Shape section and exit the Slide master by going to Slide Master > Close Master View.
Now you have a transparent textual watermark in PowerPoint!
How do I insert a logo in a PowerPoint without the background?
It’s perfectly possible to remove the background from your logo in PowerPoint. It can be a white background or a background of any other solid color. Follow these steps:
- Once your logo is imported, click on it to select it.
- Open the Picture Format section in the ribbon.
- Then go to the Color and select the Set Transparent Color in the drop-down menu. This will turn your cursor into an eyedropper.
- Using the eye-dropper, click on the white background that you want to remove. Now, the white color will be set as transparent. And just like that your white background is removed!
However, the downside of this is that all the white areas in your image will become transparent. So, it won’t work if there’s quite a lot of white in your logo, too.
How do I add a background image to a PPT slide?
You’ll be surprised how easy it is. Let’s see how this can be done:
- First, open your presentation or create a new one.
- At the top, select View > Slide Master.
- Select the very first slide in the pane on the left, if you need an image to be on every slide.
- In the ribbon, select the Insert section and click on the “Pictures”. You can import your image from your device as well as use Stock or Online images.
- Import your image, then resize and reposition it. Make any other necessary adjustments to the image.
- Go to Picture Format > Transparency and choose the necessary level of transparency.
- Right-click on the image and pick the “Send to Back” option in the menu.
- Finally, close the Slide Master.
All done! Now, there’s a background image on your PPT slide.
Conclusion
Watermarking your PowerPoint presentation might seem like a complicated and intimidating task. But it’s really not. In fact, it’s not laborious, tedious or time-consuming. It can take you just a couple of minutes to add a watermark to every slide in your PowerPoint presentation. Moreover, if you add a new slide, your watermark will appear on it automatically. You can write any text in your watermark. You can watermark your presentation with a logo, which will make you look like a true professional. It’s a great idea to watermark photos in your PowerPoint presentation, too. This way, you won’t have to worry about anyone stealing your presentation or the visual content in it. Watermarking is an important skill to master as it will benefit you and your work greatly.
More articles
How to Сrop a Picture into a Circle in PowerPoint